GT New Horizons · Extremely Ultimate Voltage (UEV)
Exo-Foundry
The Exo-Foundry is a UEV tier multiblock for casting liquid metals into molds at a massive scale. The Exo-Foundry is a direct upgrade from the Mass Solidifier because it can run significantly faster with a higher energy discount and many more parallels. The exact values vary significantly with the amount and number of modules installed. There are seven modules in total and each one grants a unique bonus to the machine but there are only 2/3/4 slots depending on the tier of the structure. The modules can all be different, or potentially the same to stack bonuses. There is also four module pairings that offer one-time bonuses for even better performance.
Construction
The Exo-Foundry is available in three tiers. The only structural difference between them is the magnetic chassis blocks and the only functional difference between them is the number of module slots (2/3/4). Buses/hatches may replace any primary Exo-Foundry casing anywhere on the structure. The minimum casing requirement supports up to 25 inputs for the 35 total molds. Multi-amp and laser energy hatches are supported, but the Exo-Foundry cannot overclock beyond the voltage tier of the energy hatch without the Hypercooler or Heliocast Reinforcement modules. There is no maintenance or muffler hatch. Right-click the controller with a screwdriver to disable animations. Use the Multiblock Structure Hologram Projector to visualize/build the structure with subchannel "chassis" to specify the tier of the magnetic chassis blocks.
Select which modules to use in the GUI of the controller and then use the Multiblock Structure Hologram Projector to build them. They appear as rings around the central column and their stats are summarized under "display machine information" in the GUI of the controller. The ordering has no effect on the operation of the machine. Remove modules by shift left-clicking them in the selection menu and then physically destroying them with a Vajra or other tool.
Structure
- Controller: Front center, 2nd layer
- 548 Exo-Foundry Containment Glass
- 462-485 Primary Exo-Foundry Casing
- 282 Inner Exo-Foundry Siphon Casing
- 260 Magnetic Chassis (Tiered)
- 224 Netherite Frame Box
- 196 Central Exo-Foundry Regulation Casing
- 173 Black Plutonium Item Pipe Casing
- 1+ Energy Hatch: Any primary casing
- 0+ Input Bus: Any primary casing
- 1+ Input Hatch: Any primary casing
- 1+ Output Bus: Any primary casing
Wallsharing
Exo-Foundries may wallshare each of their sides to save on casings, module components, and buses/hatches. However, do not share the energy hatch because the machine pulls as many amps as possible while there are still parallels or overclocks available.
Modules
The Exo-Foundry runs at 150% speed and offers 16 parallels per voltage tier without any modules, as seen in the following table. It also cannot run UIV+ recipes without a Heliocast Reinforcement or Universal Collapser module. That is slower, less efficient, and more restrictive than the Mass Solidifier at maximum speed, but those are only the base stats of the machine and are improved significantly with every installed module. The effective voltage for determining parallels is NOT capped by the tier of the energy hatch like overclocks are, but there must be multiple energy hatches regardless of the number of amps.
| Parallels | LV | MV | HV | EV | IV | LuV | ZPM | UV | UHV | UEV | UIV | UMV | UXV | MAX | MAX+ |
| Base | 16 | 32 | 48 | 64 | 80 | 96 | 112 | 128 | 144 | 160 | 176 | 192 | 208 | 224 | 240 |
| 1 SCB | 28 | 56 | 84 | 112 | 140 | 168 | 196 | 224 | 252 | 280 | 308 | 336 | 364 | 392 | 420 |
| 2 SCB | 40 | 80 | 120 | 160 | 200 | 240 | 280 | 320 | 360 | 400 | 440 | 480 | 520 | 560 | 600 |
 1 SCB |
36 | 72 | 108 | 144 | 180 | 216 | 252 | 288 | 324 | 360 | 396 | 432 | 468 | 504 | 540 |
| 2 SCB
|
48 | 96 | 144 | 192 | 240 | 288 | 336 | 384 | 432 | 480 | 528 | 576 | 624 | 672 | 720 |
There are seven modules in total and 2/3/4 module slots depending on the tier of the structure. Select which modules to use in the GUI of the controller. The modules can all be different, or potentially the same to stack bonuses. The only exceptions are the Hypercooler, Sentient Overclocker, and Universal Collapser modules which are all capped at 1 per Exo-Foundry.
The Heliocast Reinforcement and Sentient Overclock modules both increase the overclock factor of the machine which is a unique mechanic that simply increases the speed bonus with every overclock. For example, an imperfect overclock is 2x speed for 4x power (2/4) but increasing the overclock factor by 0.4 buffs each overclock to 2.4x speed for 4x power (2.4/4).
Superdense Casting Basins
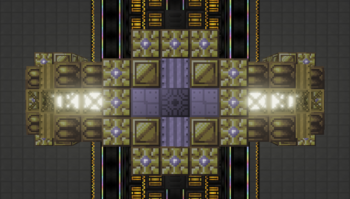
The SCB module (UEV) adds 12 parallels per voltage tier on top of the base 16 parallels per voltage tier, and reduces the minimum number of casings by 36. That is a total of 28 parallels per voltage tier and enough space for 61 inputs for the 35 total molds. There is no limit on the amount of SCB modules per Exo-Foundry. Pairing the SCB with the Streamlined Casters module unlocks Optimum Production which is a one-time bonus of +8 parallels per voltage tier and +80% speed.
Structure
|
 |
Proto-Volt Stabilizer
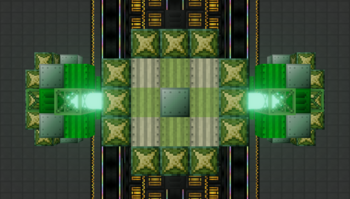
The PVS module (UEV) subtracts 10% from the base EU/t cost of recipes and multiplies the result by 0.8, as seen in the following equation. That is a 28% EU/t discount with one PVS and 49% EU/t discount with two PVS. However, that does NOT increase the speed of the Exo-Foundry since the recipe length is left unchanged. The additive bonus stacks with the Heliocast Reinforcement module and the multiplicative bonus stacks with the Universal Collapser module. There is no limit on the amount of PVS modules per Exo-Foundry. Pairing the PVS with the Sentient Overclocker module unlocks  Harmonic Efficiency which is a one-time bonus of -50% EU/t and +0.1 overclock factor.
|
 |
Streamlined Casters
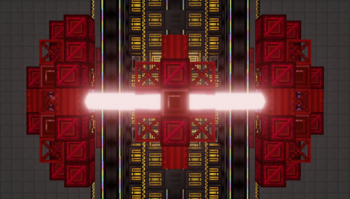
The SC module (UEV) increases the base speed of the Exo-Foundry by 150% on top of the base 150% speed, as seen in the following equation. That is a total of 300% speed with one SC and 450% with two SC. The additive bonus stacks with the Heliocast Reinforcement module and the multiplicative bonus stacks with the Universal Collapser module. There is no limit on the amount of SC modules per Exo-Foundry. Pairing the SC with the Superdense Casting Basins module unlocks Optimum Production which is a one-time bonus of +8 parallels per voltage tier and +80% speed.
|
 |
Hypercooler
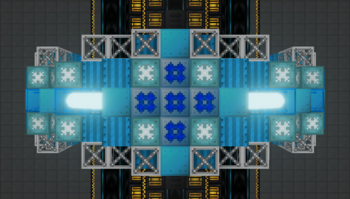
The HC module (UIV) consumes coolant while the machine is running to increase the maximum number of overclocks beyond the voltage tier of the energy hatch. Supply coolant through an input hatch on the module itself, NOT the Exo-Foundry. The number of additional overclocks depends on the type of coolant provided, as seen in the following table. There is a limit of 1 HC module per Exo-Foundry. Pairing the HC with the Universal Collapser module unlocks  Realized Potential which is a one-time bonus that allows eternity to be used as a coolant for up to 3 additional overclocks, multiplies the power consumption by 2x, and multiplies the speed by 2x.
|
 |
Heliocast Reinforcement
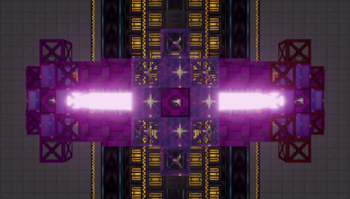
The HR module (UIV) unlocks UIV+ recipes which includes all fluid solidifier recipes with eternity, universium, or magmatter as well as transcendentally reinforced borosilicate glass and hawking radiation realignment focus glass. There is no limit on the amount of HR modules per Exo-Foundry. Pairing 3+ HR modules together unlocks  Entropic Core which is a scaling bonus based on the total number of HR modules, as seen in the following table.
Entropy () is a random value between 0 and the number of HR modules present (inclusive) that is rolled at the start of each recipe to determine the exact bonuses from Entropic Core. Entropy can either significantly slow down or accelerate processing so it can be risky. The average entropy value for 3 HR is S=1.5 and the average entropy value for 4 HR is S=2.0.
|
 |
Sentient Overclocker
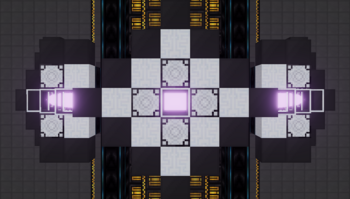
The SO module (UMV) increases the overclock factor of the machine by 0.40 which means every imperfect overclock provides an additional 40% speed, as seen in the following table. The magnetic chassis blocks must match the tier of the Exo-Foundry for the module to form. There is a limit of 1 SO module per Exo-Foundry. Pairing the SO with the Proto-Volt Stabilizer module unlocks Harmonic Efficiency which is a one-time bonus of -50% EU/t and +0.1 overclock factor. The Heliocast Reinforcement values are only averages since their actual bonuses are randomized with each recipe.
Structure
|
 | |||||||||||||||||||||||||||||||||||||||||||||||
Universal Collapser
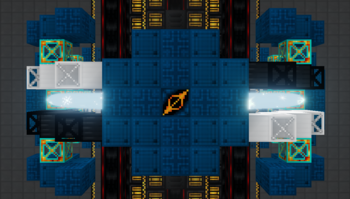
The UC module (UXV) unlocks UIV+ recipes, multiplies the power consumption by 4x, multiplies the speed by 4x, and increases the minimum number of casings by 15. That is effectively a forced perfect overclock and leaves space for only 10 inputs for the 35 total molds. There is a limit of 1 UC module per Exo-Foundry. Pairing the UC with the Hypercooler module unlocks Realized Potential which is a one-time bonus that allows eternity to be used as a coolant for up to 3 additional overclocks, multiplies the power consumption by an additional 2x, and multiplies the speed by an additional 2x.
Structure
|
 |
Pairings
There are four unique pairings of modules that provide additional bonuses to the Exo-Foundry. These have all been described in the module subsections above, but summarized here for reference. These bonuses are only applied once even if there are two of each module. For example, having two ECB and two SC does NOT double the bonus from Optimum Production.
|
|
|
| ||||||||||||||||||||||||||||||||


Optimal Setups
There are many possible module combinations and it is not entirely obvious which are the most effective. To help decide between them all, the following tables compare a few that stand out above the rest at different stages of the game. Their hatch space assumes only one energy hatch and their relative throughput is calculated with the following equation where is the number of voltage tiers above the recipe.
At least one HR or UC module is required for UIV+ recipes, but the most optimal setups do not always have them. Therefore, it is recommended to have at least two Exo-Foundries and split recipes based on their voltage tier. The stats of the Exo-Foundries with 3+ HR modules are averages since the actual bonuses are randomized at the start of each recipe.
T1 Infinite Magnetic Chassis
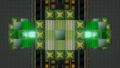
In UEV, the Exo-Foundry has two module slots and three module options (SCB, PVS, and SC). The only pairing bonus available is Optimum Production.
| Option 1 | Option 2 | Option 3 | |
| Module 2 | 
|
|
|
| Module 1 |
|
|
|
| Parallels | 36 per Voltage Tier | 16 per Voltage Tier | 28 per Voltage Tier |
| Speed | 380% | 300% | 150% |
| EU/t | 100% | 72% | 72% |
| OC Factor | 2.00 / 4 | 2.00 / 4 | 2.00 / 4 |
| Overclocks | +0 | +0 | +0 |
| Hatch Space | 61 | 25 | 61 |
| Throughput vs. Recipe Tier | ||||
| UEV | N=0 | 1,368 | 480 | 420 |
| UHV | N=1 | 2,736 | 960 | 840 |
| UV | N=2 | 5,472 | 1,920 | 1,680 |
| ZPM | N=3 | 10,944 | 3,840 | 3,360 |
| LuV | N=4 | 21,888 | 7,680 | 6,720 |
| IV | N=5 | 43,776 | 15,360 | 13,440 |
| EV | N=6 | 87,552 | 30,720 | 26,880 |
| HV | N=7 | 175,104 | 61,440 | 53,760 |
| MV | N=8 | 350,208 | 122,880 | 107,520 |
T2 Eternal Magnetic Chassis
In UIV, the Exo-Foundry has three module slots and five module options (SCB, PVS, SC, HC, and HR). The pairing bonuses available are Optimum Production and Entropic Core. The highest tier coolant available is super coolant for 1 additional overclock.
| Option 1 | Option 2 | Option 3 | Option 4 | ||
| Module 3 | 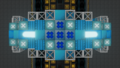
|

|
|
| |
| Module 2 |
|
|
|
| |
| Module 1 |
|
|
|
| |
| Parallels | 36 per Voltage Tier | 36 per Voltage Tier | 16 per Voltage Tier | 28 per Voltage Tier | |
| Speed | 380% | 380% | 300% | 300% | |
| EU/t | 100% | 100% | 100% | 77.5% | |
| OC Factor | 2.00 / 4 | 2.00 / 4 | 2.00 / 4 | 2.075 / 4 | |
| Overclocks | +1 | +0 | +1 | +0 | |
| Hatch Space | 61 | 61 | 25 | 25 | |
| Throughput vs. Recipe Tier | |||||
| UIV+ | N=0 | ---- | 1,505 | 1,056 | 924 |
| UEV | N=1 | 6,019 | 3,010 | 2,112 | 1,917 |
| UHV | N=2 | 12,038 | 6,019 | 4,224 | 3,978 |
| UV | N=3 | 24,077 | 12,038 | 8,448 | 8,255 |
| ZPM | N=4 | 48,154 | 24,077 | 16,896 | 17,129 |
| LuV | N=5 | 96,307 | 48,154 | 33,792 | 35,544 |
| IV | N=6 | 192,614 | 96,307 | 67,584 | 73,753 |
| EV | N=7 | 385,229 | 192,614 | 135,168 | 153,038 |
| HV | N=8 | 770,458 | 385,229 | 270,336 | 317,553 |
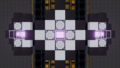
In UMV, the Exo-Foundry has three module slots and six module options (SCB, PVS, SC, HC, HR, and SO). The pairing bonuses available are Optimum Production, Entropic Core, and Harmonic Efficiency. The highest tier coolant available is spacetime for 2 additional overclocks.
| Option 1 | Option 2 | Option 3 | Option 4 | Option 5 | |
| Module 3 |
|
|
|
|
|
| Module 2 |
|
|
|
|
|
| Module 1 |
|
|
|
|
|
| Parallels | 36 per Voltage Tier | 16 per Voltage Tier | 16 per Voltage Tier | 16 per Voltage Tier | 28 per Voltage Tier |
| Speed | 380% | 300% | 150% | 300% | 300% |
| EU/t | 100% | 100% | 32% | 100% | 77.5% |
| OC Factor | 2.00 / 4 | 2.40 / 4 | 2.50 / 4 | 2.00 / 4 | 2.075 / 4 |
| Overclocks | +2 | +2 | +2 | +2 | +0 |
| Hatch Space | 61 | 25 | 25 | 25 | 25 |
| Throughput vs. Recipe Tier | ||||||
| UMV+ | N=0 | ---- | ---- | ---- | 2,304 | 1,008 |
| UIV | N=1 | ---- | ---- | ---- | 4,608 | 2,092 |
| UEV | N=2 | 26,266 | 19,110 | 11,250 | 9,216 | 4,340 |
| UHV | N=3 | 52,531 | 45,865 | 28,125 | 18,432 | 9,006 |
| UV | N=4 | 105,062 | 110,075 | 70,313 | 36,864 | 18,687 |
| ZPM | N=5 | 210,125 | 264,181 | 175,781 | 73,728 | 38,775 |
| LuV | N=6 | 420,250 | 634,034 | 439,453 | 147,456 | 80,458 |
| IV | N=7 | 840,499 | 1,521,681 | 1,098,633 | 294,912 | 166,950 |
| EV | N=8 | 1,680,998 | 3,652,035 | 2,746,582 | 589,824 | 346,422 |
T3 Celestial Magnetic Chassis
In UXV, the Exo-Foundry has four module slots and seven module options (SCB, PVS, SC, HC, HR, SO, and UC). The pairing bonuses available are Optimum Production, Entropic Core, Harmonic Efficiency, and Realized Potential. The highest tier coolant available is eternity for 3 additional overclocks, although that requires Realized Potential.
| Option 1 | Option 2 | Option 3 | Option 4 | Option 5 | ||
| Module 4 | 
|
|
|
|
| |
| Module 3 |
|
|
|
|
| |
| Module 2 |
|
|
|
|
| |
| Module 1 |
|
|
|
|
| |
| Parallels | 16 per Voltage Tier | 28 per Voltage Tier | 16 per Voltage Tier | 36 per Voltage Tier | 32 per Voltage Tier | |
| Speed | 2,400% | 1,200% | 1,200% | 3,040% | 350% | |
| EU/t | 800% | 800% | 256% | 800% | 70% | |
| OC Factor | 2.40 / 4 | 2.40 / 4 | 2.50 / 4 | 2.00 / 4 | 2.10 / 4 | |
| Overclocks | +3 | +3 | +3 | +3 | +2 | |
| Hatch Space | 10 | 46 | 10 | 46 | 25 | |
| Throughput vs. Recipe Tier | ||||||
| UXV+ | N=0 | 69,009 | 60,383 | 39,000 | 113,818 | 6,421 |
| UMV | N=1 | 165,623 | 144,920 | 97,500 | 227,635 | 13,484 |
| UIV | N=2 | 397,494 | 347,807 | 243,750 | 455,270 | 28,316 |
| UEV | N=3 | 953,986 | 834,738 | 609,375 | 910,541 | 59,465 |
| UHV | N=4 | 2,289,567 | 2,003,371 | 1,523,438 | 1,821,082 | 124,875 |
| UV | N=5 | 5,494,960 | 4,808,090 | 3,808,594 | 3,642,163 | 262,238 |
| ZPM | N=6 | 13,187,903 | 11,539,415 | 9,521,484 | 7,284,326 | 550,701 |
| LuV | N=7 | 31,650,968 | 27,694,597 | 23,803,711 | 14,568,653 | 1,156,472 |
| IV | N=8 | 75,962,323 | 66,467,032 | 59,509,277 | 29,137,306 | 2,428,591 |