GT New Horizons · Extreme Voltage (EV)
Applied Energistics 2
Applied Energistics 2 (AE2) is an extraordinarily useful autocrafting and storage mod for items and fluids, but please note that AE2 is not limited to just this purpose. It is possible to transport energy (EU and RF), fluids, vis, redstone signals, light, and even space. It can do all these things cross-dimensionally on top of this! You will use this mod until the end of your experience in GT:NH starting from EV tier, as the base material for the mod is Titanium.
This wiki page/guide includes all AE2 addons that are present on the pack: AE2 stuff, AE2 fluid crafting, Thaumic Energistics, and GregTech ME inputs/outputs. Also see Good Practices With AE.
Channels
One of the fundamental resources in AE2 is channels. They are a measure of how many AE2 devices you can connect using a cable (e.g. an 8 channel cable may connect roughly 8 devices). As well as how many devices in total your network could support.
Most AE2 devices require a channel before they will turn on, although some simply need to be connected to the network and don't take up a channel. In general, most things that involve transporting items or permanently holding items (i.e. drives and storage buses) require a channel.
Only "Smart" cables will visually identify how many channels are in use, as well as make the information available in the tooltip that pops up when you look at the cable. It is therefore good practice to use at least one length of smart cable in every link when you start out, as running out of channels is a common mistake.
Network channels can also be visualized using a "Network Visualization Tool" even without using smart cables, the use of the tool can be seen below. To use it right_click on any network to select it and shift+rotate_mouse_wheel to change mode. If channels are missing the network tool will show it to you in red.
-
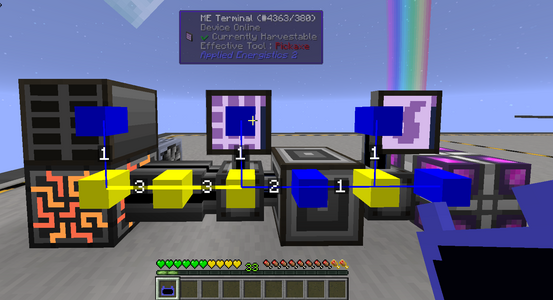 Example usage of the Network Visualization Tool.
-
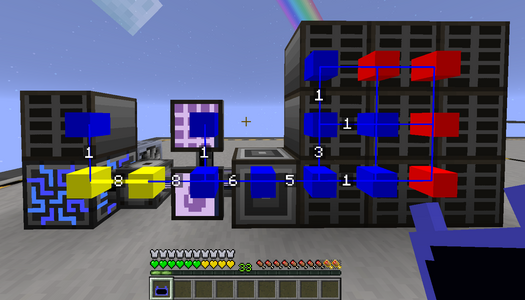 Example usage of the Network Visualization Tool in a network with missing channels.
ME Controller
ME Controllers are the heart of your AE2 setup. Each ME Controller provides 32 channels on each face. Without an ME Controller a network can only support up to 8 channels. You will most likely want to build a central multiblock ME controller following these rules:
- All ME Controllers in a network must be touching
- The maximum length of one axis of the multiblock is 7 blocks
- An ME Controller can have 2 adjacent blocks in at most 1 axis (essentially means that, of the 3 axes (north/south, east/west, up/down), only one of those axes can have 2 controller blocks on both sides of any given controller and that the other axes may only have one controller after that. One of the implications of this is that you cannot form a "+" shape with your controllers, whereas a "T" shape is fine.)
-
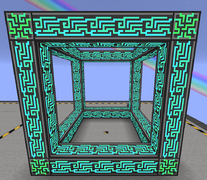 Valid 7x7x7 ME controller
-
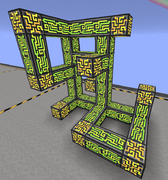 Valid ME controller shape
-
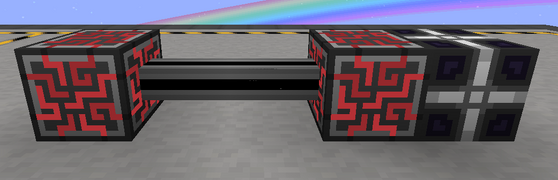 Invalid ME controller (1st rule)
-
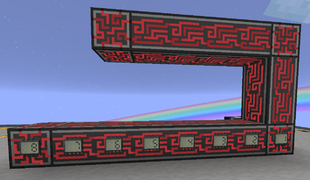 Invalid ME controller (too long) 8x4x1
-
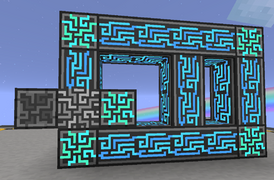 Invalid ME controller shape (3rd rule)
Cables
Four main types of cabling exist, and have the following key features and disadvantages:
- Quartz Fiber:
- Can only transfer power, does not transfer any channels. It's primarily used to share power between a network and its subnetworks. (Subnetworks are expanded upon in the subnetworks section).
- Glass cables can hold up to 8 channels and power. Covered cables are functionally equivalent to glass cables.
- Smart cables can hold up to 8 channels and power. In addition to this, they will visually show how many of the 8 channels are currently being used. This makes it very useful for debugging issues other than using the "Network Visualization Tool". However, crafting them is relatively expensive for EV-IV players, so use sparingly when resources are limited.
- Dense cables can hold up to 32 channels and power. Just like smart cables, they visually display how many channels are currently in use. The downside is that they cannot connect directly to AE2 microblocks (such as terminals and flat-face interfaces). This means that one of their main purposes is to carry an entire Controller face's worth of channels over long distances.
Other key cable related information:
- Most AE2 devices cannot directly connect to dense cables and will require a 8 channel intermediary cable. Dense cables are primarily used as a backbone cable to transfer channels from an ME Controller block face, or from a P2P termination point.
- Uncolored cables will connect to any other nearby cables and can be quite frustrating to work with once a network starts scaling. It is recommended to use as much colored cabling as possible to make running cables next to each other easier.
- All cables except quartz fiber can be colored with dye using a shaped crafting recipe. Dyes can also be removed via shaped crafting with a water bucket. Or using a spray can.
- Cable Anchors can be used to prevent same-colored cables from connecting to each other.
- Cable facades can be used to hide cabling, interfaces and buses. They can be crafted to match nearly every Minecraft block, however not all of these recipes show up on NEI. Instead, to craft the facade, put 4 cable anchors and a block which will give the cable facade for whatever block is put in the middle of the cable anchors. The AE2 Network Wrenches allows easy removal of facades as well as the ability to see through facades, allowing for easy debugging of systems without tearing everything apart.
-
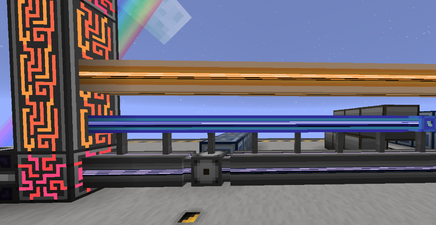 Separated cables using cable anchors and colors
-
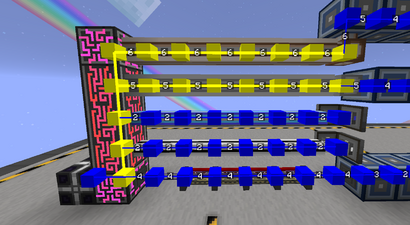 Network tool active
-
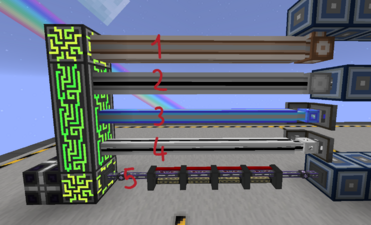 1,4: Smart cables 2,3: covered cables 5: conduits with some other EnderIO cables
Cable Facades:
ME Terminals
ME Terminals allow players to input/output items, liquids, patterns, request items to be crafted and much more. The following ME Terminals are available:
- ME Terminal: allows the manual insertion/extraction of items (including fluid drops) into/from the ME network.
- Crafting Terminal: like a regular terminal with a crafting grid for 3x3 shaped crafting recipes.
- ME Fluid Terminal: allows the manual insertion/extraction of fluid, using fluid cells or tanks to take/empty fluids in them.
- ME Pattern Terminal: essentially a ME terminal but will also allow one to create patterns for autocrafting purposes (explained below).
- ME Fluid Pattern Terminal: An upgraded ME Pattern Terminal that allows fluids to be included in recipes.
- ME Fluid Processing Pattern Terminal which is designed for crafting processes that require more input/output slots, accommodating more complex setups.
- Interface Terminal: allows for the insert/extraction of crafting patterns into/from any interfaces/GregTech crafting inputs that are connected to the ME network, also allows players to filter by broken recipes (that can generate when updating the pack version and recipes change) or searching by interface names/crafting inputs/crafting outputs.
- Level Terminal: allow to see all ME level maintainers and Level Emitters from a single GUI, has a search function.
- Essentia Terminal: allows the manual insertion/extraction of Thaumcraft essentia using jars or Glass Phials.
- Arcane Crafting Terminal: used for Thaumcraft crafting (like an Arcane Worktable), a bit buggy but very useful as it can link with a relay using a memory card, recharging your wand. It also has slots for your crafting armor, with a button to quickly swap between it and your current armour to maximize vis discount.
All interfaces have a button on the top-right that allows players to see active autocrafting processes, this will be explained further in the autocrafting section. All the terminals have a wireless variant that can be opened, they can also be combined in one making a "Universal Wireless Terminal".
-
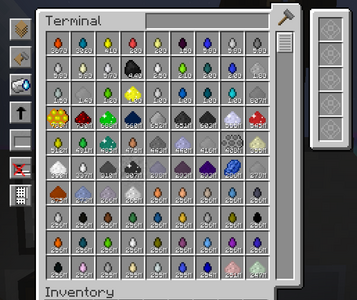 Terminal
-
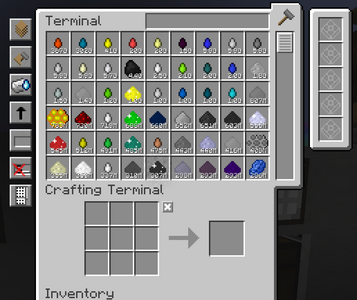 Crafting Terminal
-
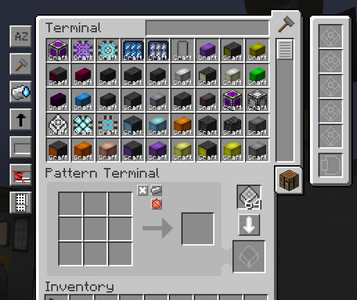 Pattern Terminal
-
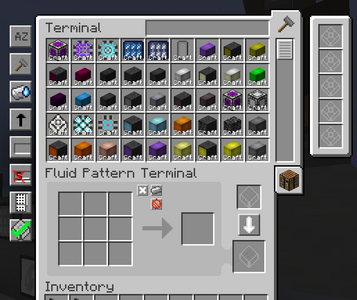 Fluid Pattern Terminal (crafting pattern mode)
-
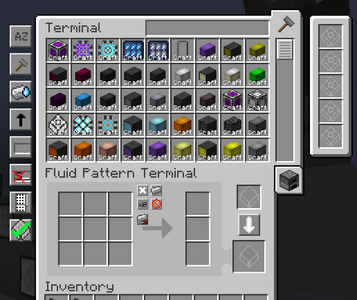 Fluid Pattern Terminal (Pattern Processing mode)
-
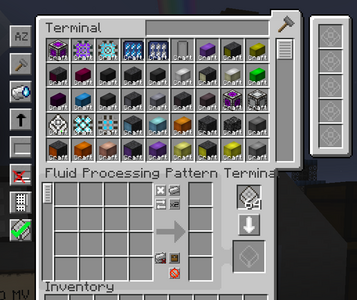 Fluid Pattern Processing Terminal
-
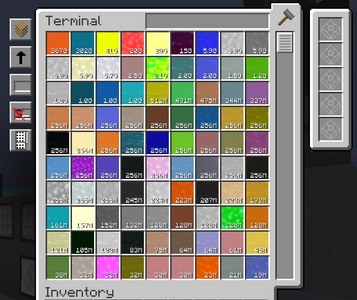 Fluid terminal
-
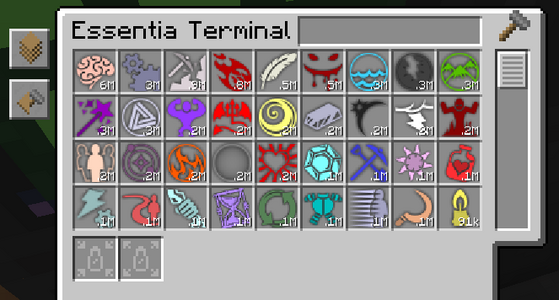 Essentia Terminal
-
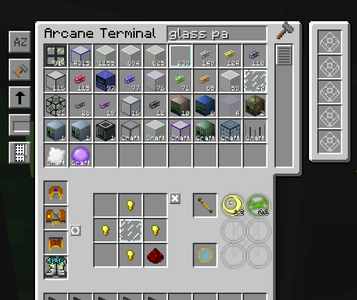 Arcane Terminal
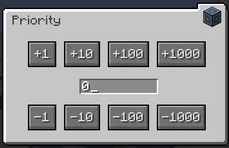
AE2 Storage Priority System
AE2 has a priority system for inserting and extracting items with ME drives, ME interfaces, ME chests, and storage buses. Priority can range from -2,147,483,647 to 2,147,483,647.
Components with a higher priority receive items or fluids first, but are also extracted from last.
ME Drives & Storage Cells
ME Drives are the backbone of your storage network. They carry up to 10 storage cells each despite only using 1 channel. They also carry channels from adjacent AE2 devices, which means only one connection is needed per cluster of ME drives, up to 8.
Storage cells are highly upgradeable and portable devices that hold items, fluids, or essentia for the network. Their capacity is measured in bytes and are limited in the number of types, or unique inputs, that they can carry.
- ME Storage Cells - 8 items per byte. Maximum 63 types.
- ME Fluid Storage Cells - 2,048L of fluid per byte. Maximum 5 types.
- ME Essentia Cells - 2 essentia per byte. Maximum 69 types.
Each type also consumes a fixed amount of bytes (1/128th of a cell's total capacity) simply for existing in the storage cell, sort of like a registration fee. That means storage cells can lose nearly half their capacity just for holding 63 different types simultaneously. The total capacity is NOT partitioned by type which means it is possible for a single type to fill the entire storage cell by itself.
| ME Storage Cells | ME Fluid Storage Cells | ME Essentia Cells | ||||||||
| Name | Capacity | Types | Name | Capacity | Types | Name | Capacity | Types | ||
| 1k | 1,024 Bytes | 63 | 1k | 1,024 Bytes | 1 or 5 | 1k | 1,024 Bytes | 12 | ||
| 4.10k - 8.13k Items | 2.02M - 2.08M Liters | 2.05k Essentia | ||||||||
| 4k | 4,096 Bytes | 63 | 4k | 4,096 Bytes | 1 or 5 | 4k | 4,096 Bytes | 12 | ||
| 16.6k - 32.5k Items | 8.06M - 8.32M Liters | 8.2k Essentia | ||||||||
| 16k | 16,384 Bytes | 63 | 16k | 16,384 Bytes | 1 or 5 | 16k | 16,384 Bytes | 12 | ||
| 66.5k - 130k Items | 32.2M - 33.3M Liters | 32.8k Essentia | ||||||||
| 64k | 65,536 Bytes | 63 | 64k | 65,536 Bytes | 1 or 5 | 64k | 65,536 Bytes | 12 | ||
| 266k - 520k Items | 129M - 133M Liters | 131k Essentia | ||||||||
| 256k | 262,144 Bytes | 63 | 256k | 262,144 Bytes | 1 or 5 | 256k | 262,144 Bytes | 24 | ||
| 1.06M - 2.08M Items | 516M - 533M Liters | 524k Essentia | ||||||||
| 1,024k | 1,048,576 Bytes | 63 | 1,024k | 1,048,576 Bytes | 1 or 5 | 1,024k | 1,048,576 Bytes | 36 | ||
| 4.26M - 8.32M Items | 2.06G - 2.13G Liters | 2.10M Essentia | ||||||||
| 4,096k | 4,194,304 Bytes | 63 | 4,096k | 4,194,304 Bytes | 1 or 5 | 4,096k | 4,194,304 Bytes | 48 | ||
| 17.0M - 33.3M Items | 8.25G - 8.52G Liters | 8.39M Essentia | ||||||||
| 16,384k | 16,777,216 Bytes | 63 | 16,384k | 16,777,216 Bytes | 1 or 5 | 16,384k | 16,777,216 Bytes | 60 | ||
| 68.2M - 133M Items | 33.0G - 34.1G Liters | 33.6M Essentia | ||||||||
| Quantum | 134,217,727 Bytes | 1 | Quantum | 134,217,727 Bytes | 1 | Quantum | 134,217,727 Bytes | 5 | ||
| 1.07G Items | 275G Liters | 268M Essentia | ||||||||
| Digital Singularity | 576P Bytes | 1 | Digital Singularity | 2.25P Bytes | 1 | Digital Singularity | 2.31E Bytes | 5 | ||
| 4.61E Items | 4.61E Liters | 4.61E Essentia | ||||||||
| Artificial Universe | 576P Bytes | 63 | Artificial Universe | 4.50P Bytes | 63 | Thaumometric | Unlimited Bytes | 69 | ||
| 4.61E Items | 9.22E Liters | Unlimited Essentia | ||||||||
| Void | Unlimited Bytes | 0 | Void | Unlimited Bytes | 0 | |||||
| Voids EVERYTHING | Voids EVERYTHING | |||||||||
| Block Container | 65,536 Bytes | 1 | Infinity Water | Unlimited Bytes | 1 | |||||
| 524k Items | Unlimited Water | |||||||||
ME IO Port
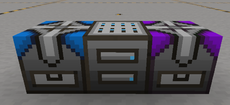
The ME IO Port moves items, fluids, and essentia between the attached ME network and contained physical storage cells. The direction of transfer can be specified in the UI.
Acceleration, hyper-acceleration, and superluminal acceleration cards can be inserted to increase the speed of the transfer, as seen in the following table.
| Card Type | Amount | Multiplier | Items per operation | Fluid per operation |
| None | 0 | 1 | 256 | 256,000 L |
| Acceleration Card | 1 | 2 | 512 | 512,000 L |
| 2 | 4 | 1024 | 1,024,000 L | |
| 3 | 8 | 2048 | 2,048,000 L | |
| Hyper-Acceleration Card | 1 | 16 | 4096 | 4,096,000 L |
| 2 | 128 | 32,768 | 32,768,000 L | |
| 3 | 1024 | 262,144 | 262,144,000 L | |
| Superluminal Acceleration Card | 1 | 131,072 | 33,554,432 | 33,554,432,000 L |
| 2 | 8,388,608 | 2,147,483,648 | 2,147,483,648,000 L | |
| 3 | 526,870,912 | 137,438,953,472 | 137,438,953,472,000 L |
The IO Port can be configured into the UI to move cells into the output once it is empty, full, or once it completes an operation.
The IO Port is useful for organizing and compacting storage cells, or can serve as an export bus that exports everything from the attached network if the cells are cycled to another network's IO port.
Cell Workbench
The Cell Workbench/Essentia Cell Workbench allows for storage cells to be partitioned (filtered). It also allows for the installation of upgrade cards to the cells.
Cell Upgrades
- Sticky Card: Any items, fluids, and essentia partitioned on this cell may only be stored on cells or storage buses with sticky cards and not elsewhere on the network.
- Overflow Void Card: Excess items, fluids, and essentia entering this cell will be voided.
- Equal Distribution Card: Limits per-type storage of the cell to total bytes / total types.
Import and Export Buses
| Upgrade Type | L/t | L/s |
| - | 200 | 4,000 |
| 1 acceleration card | 1,600 | 32,000 |
| 2 acceleration cards | 6,400 | 128,000 |
| 3 acceleration cards | 12,800 | 256,000 |
| 4 acceleration cards | 19,200 | 384,000 |
| 1 hyper-acceleration card | 6,400 | 128,000 |
| 2 hyper-acceleration cards | 102,400 | 2,048,000 |
| 3 hyper-acceleration cards | 1,228,800 | 24,576,000 |
| 4 hyper-acceleration cards | 9,830,400 | 196,608,000 |
Export buses/fluid export buses will export items/fluids out of a network's storage.
Import buses will automatically extract from the attached inventory and place those items in the network storage.
However export buses need to be set to export a specific material, or will export that material when needed if connected to an ME interface.
To access the filter setting right click on the Import/Export bus and use either a sample material from your inventory or drag a sample from NEI into the slot.
By default the export and import buses can only be filtered to one material. This can be expanded using up to 2 capacity cards. And the speed of transfer upgraded using up to 4 acceleration/hyper-acceleration cards. Each bus can only have a total of four upgrades.
Note, import and export always refer to the network. The export bus takes items out of the network, and the import bus into the network and out of the attached storage.
Storage Bus
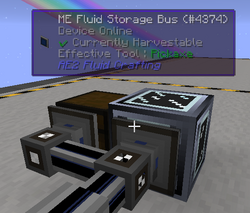
ME Storage Buses/ME Fluid Storage Buses treat adjacent inventories, like chests or tanks, as an extension of network storage. This includes other networks, accessed through an interface.
Storage buses can be filtered in the UI to limit what types of items can be extracted or inserted from the adjacent inventory. They can also be configured in the UI to only allow extraction from the adjacent inventory into the network, only allow insertion into the adjacent inventory from the network, or allow both (bidirectional). In bidirectional mode, the storage bus can be configured to only allow visibility of filtered items (strict) or allow visibility of all items (loose) to the attached network.
Storage buses on drawers, drawer controllers, super chests, super tanks, and YOTTanks can be used as an alternative to storage cell storage. In general, these alternatives scale worse than storage cells and are laggier (especially drawer controllers!).
The interaction between storage buses and interfaces allows for subnetworks to exist.
Storage buses can be used on GregTech multiblock input hatches and buses on a network dedicated to that multiblock. Ingredients input into the network will seek a place to be stored, which ends up being the input hatches and buses.
Upgrades
- Capacity Card: Adds 9 lines of filtering on the UI.
- Fuzzy Card: Ignores durability (adds a button to decide what durability to let pass) and NBT data.
- Inverter Card: Inverts all filters, even the ones from cards.
- Sticky Card: Lets an item/fluid enter the network only on that storage bus.
- Ore Dictionary Filter Card: Lets you filter items from the same or multiple dictionaries, for example
crushed* & !crushedPurified* & !crushedCentrifuged*can be used to get any crushed ores but not the washed ones. Another example,ingotHot*can be used to filter hot ingots in a Vacuum Freezer input bus or a dedicated subnet.
Interfaces
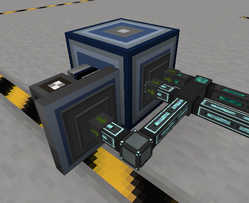
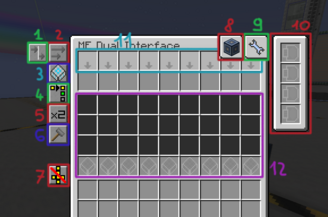
ME Interfaces have four purposes:
- Inserting items into an interface will insert them into the attached ME network. This requires storage on the network for the inserted items to travel to.
- Interfaces hold encoded patterns. When a crafting recipe using the pattern is requested on the attached network, the interface will push recipe ingredients to adjacent inventories.
- Interfaces expose the storage contents of a network to adjacent storage buses.
- Interfaces can stock specific items in their inventories from the attached ME network.
ME Dual Interfaces additionally:
- Allow insertion of fluids into the attached ME network
- Allow for held patterns to contain fluid ingredients
- Allow for fluids to be stocked
Interfaces can be shape-crafted to be in panel-mode or block-mode. Functionally, there is no difference between the two modes. Panel-mode interfaces can seamlessly exist within AE2 facades and can attach to any 6 sides of a cable or a block, whereas block-mode interfaces will take up the whole block space. Panel-mode interfaces only interact with inventories on the side they are placed on, while block-mode interfaces interact with all adjacent inventories.
GUI explanation
- Section 1: Toggle smart blocking; when enabled with blocking mode, the interface will still push recipe ingredients if the adjacent inventory contains identical recipe ingredients.
- Section 2: Toggle blocking mode; when enabled, the interface will not push recipe ingredients while adjacent inventories are nonempty. Useful for avoiding recipe conflicts.
- Section 3: Shows or hides the interface from interface terminals. Useful for I/O only interfaces.
- Section 4: Insertion mode, does or doesn't merge items when inserting.
- Section 5: Allows to double all crafting patterns inputs and outputs by 2 or 8 (shift+click)
- Section 6: Enables/disables pattern optimization (useful in UEV+)
- Section 7: Only on dual interfaces, fluid extraction direction, all or directional, referenced to the direction on image 2
- Section 8: Only on dual interfaces, opens the fluid filtering GUI (image 2). You can filter fluids with a cell or dragging cells from NEI.
- Section 9: ME storage priority configuration.
- Section 10: Slots for upgrade cards.
- Section 11: Export slots. Placing an item(s) into one of the slots will force the ME system to stock that many item(s) into the slot underneath. Something will need to pull the item out of the interface (usually a GT conveyor or an EnderIO item conduit), since it does not auto-output like an export bus.
- Section 12: Slots for patterns. Inserting them will make them craftable from ME terminals attached to the same network.
Upgrades
- Crafting Card: Automatically submits crafting requests to the attached network for stocked items and fluids. Use level maintainers instead; they are easier to use and less laggy.
- Locking Card: Has 3 modes:
- Mode 1: lock interface crafting until a redstone pulse is received from the interface
- Mode 2: lock interface crafting if redstone signal is on
- Mode 3: lock crafting if redstone signal if redstone signal is off
- Pattern Capacity Card: Unlocks another row of pattern slots.
- Advanced Blocking Card: Exposes the storage contents of the attached network to adjacent interfaces for the sake of blocking mode. If interface A holds patterns, has blocking mode enabled, and is adjacent to interface B, and interface B has an advanced blocking card, then interface A will not push recipe ingredients into interface B while interface B's attached network is nonempty. Useful for avoiding recipe conflicts on multiblocks.
See also some examples for passive and autocrafting setups below.
Autocrafting
Autocrafting is unlocked through Interfaces (EV), Crafting Input Buses (LuV), Crafting Input Proxies (UV), and Crafting Input Buffers (UIV).
Here is what happens when using autocrafting:
- Crafts are scheduled by a player, crafting card, or ME Level Maintainer. If any ingredients are missing and they have a pattern, then the necessary number of crafts is also submitted for that ingredient, forming a crafting tree. The player can see the crafting tree of the recipe and specify what CPU to use before confirming it.
- A CPU stores all items needed for the recipes and starts sending items to the machines.
- Machines process the recipes and insert the outputs back into the network.
- Any expected outputs are sent to the CPU for any possible consecutive crafting.
- All scheduled crafts finish, and the CPU dumps all items and fluids in the AE2 system respecting the "AE2 Storage Priority System".
- CPU is now empty and ready to use.
Setting Patterns
Encoded Patterns hold recipes inside them. Inserting this pattern into an ME Interface will allow one to autocraft that recipe from any terminal of the ME network. To create an Encoded Pattern, a blank pattern and a pattern terminal is needed. Inside the terminal, it will look like Figure 2:
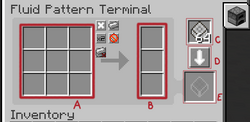
It is possible to toggle between creating crafting or processing patterns by clicking on the top right button. The button looks like a crafting table for crafting patterns and a furnace for processing patterns. Blank patterns can be inserted into slot C shown on the diagram. Once a valid pattern is entered, press the button on slot D in the diagram to encode the pattern. Encoded patterns can be overwritten with new recipes (insert it into slot E shown on the diagram and re-encode).
Crafting patterns are for 3x3 shaped crafting recipes. If a valid 3x3 combination of items is set in slot A of the diagram, the corresponding item will automatically show up in the output slot B, which allows you to actually encode the pattern; an empty output is not a valid pattern and cannot be encoded yet. Crafting patterns should be inserted into ME Interfaces that are connected to a Molecular Assembler. Note that any tools used in a shaped crafting recipe will be inserted back into the ME network after the recipe is finished.
Processing patterns are for every other non-shaped crafting recipe, most notably for machines. The left 3x3 grid is set in slot A, which is user configurable and slot B outputs represent the output items for the recipe, which are also user configurable. Just like in crafting patterns, a recipe with an empty output is not a valid pattern. Remember that quantity of items matters here, unlike for a crafting pattern. It's recommended to use bulk patterns (increasing the inputs and outputs into a bigger batch) to reduce lag, the number of crafting steps, and required Co-Processing Units, especially in the late game. Processing patterns should be inserted into ME Interfaces that are not connected to a Molecular Assembler.
How Autocrafting works
When a valid pattern is inserted into an ME Interface, the recipe will be autocraftable from a terminal. Once the autocraft for that recipe is initiated, all "input" items will be dumped into whatever inventory the pattern-holding interface is connected to.
The key thing to know is that, for processing patterns, the ME network will simply dump all the "input" items of the encoded pattern into the interface's attached inventory and will expect the "output" item to be inserted into the network at some later point in time. If there isn't enough space to dump items into, the ME network will wait until space frees up; it will not send parts of a recipe, it will send it all at once. The output item doesn't have to be inserted into the same ME Interface that started the recipe; it can be inserted from anywhere in the network, through any means (import buses work too, but not items or fluid red by storage buses), and it will satisfy the recipe. With this in mind, autocrafting in AE2 is actually very simple. The ME network has no idea what kind of inventory you are dumping the input items to, it simply dumps items and expects the pattern-specified output(s) back into the system. If it doesn't ever get the expected output(s) back, the ME network will not allow you to start another autocrafting recipe, so make sure that you have set the recipe properly. Recipes can also be cancelled at any point.
Setting Up Crafting Storage and Co-Processors
Crafting storage is required alongside patterns. Crafting storage blocks come in byte variants similar to storage cells (1k, 4k, 16k, etc.). Crafting storage is essentially a buffer where items are held until the recipe is finished. Because of this, the longer a recipe is (for example, having many "chained" recipes for a single craft), the more storage you will need to start that job.
Crafting Storage can be expanded in a multiblock structure. The only rules are that it must be a cuboid and it must have at least 1 crafting storage block. The entire multiblock will only use 1 channel.
Co-Processors allow for recipes to be executed simultaneously amongst many interfaces. For example, if you had 4 encoded patterns for a 1x tin cable and each of those were inserted into 4 separate interfaces, having 3 Co-Processors would allow your ME network to leverage all 4 interfaces as part of the crafting recipe (this means it could use 4 assemblers simultaneously). By default, 0 Co-Processors in a network means that it can only do 1 interface's worth of that recipe at a time. Co-Processors can be part of the crafting storage multiblock.
Interfaces (EV+)
Items/fluids will be exported on the interface direction (block interface: can be set with a wrench / panel interface: it's just the facing direction). Please note that you will need dual interfaces to craft items/fluids with fluids as input.
Here are some setups that use interfaces:
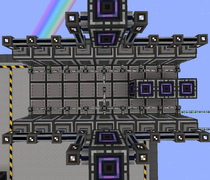
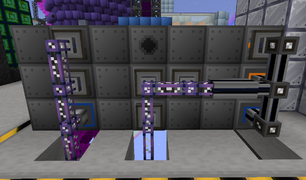
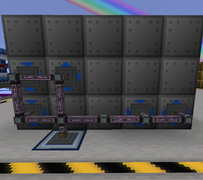
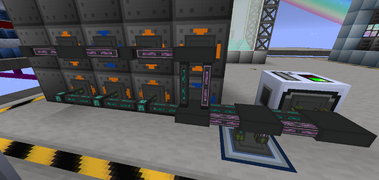
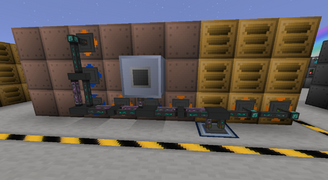
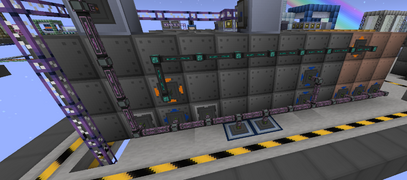
ME Level Maintainer
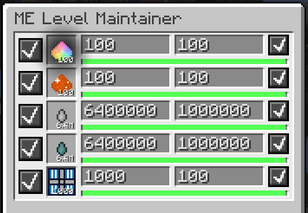
The ME Level Maintainer is used to automatically keep items and fluids in stock by using patterns already in the system to autocraft missing items and fluids and is a better alternative to crafting cards. Setting options for every items are:
- Enabled: True/False
- Amount to Maintain: Items to keep in the ME network.
- Crafting batch size: Crafting item size when not enough items are in stock.
The color of the bar below the maintained item/fluid represents the status of the maintained item.
- Green: Item/fluid is equal to or above the set amount to maintain.
- Yellow: Item is being autocrafted with patterns in the system.
- Purple: Ingredients are being exported to autocraft the item.
- Red: Unable to maintain the item through autocrafting. Can be due to lack of a pattern to allow the Level Maintainer to autocraft or a lack of ingredients to autocraft the item.
Note: While Level Maintainers are a powerful tool to use, using them excessively can result in performance drops for the world. A lot of items and fluids can be made in large batches or made passively instead of maintaining them, such as most rubbers and plastics.
Molecular Assembler
This device will perform shaped crafting recipes dictated by the interfaces that are connected to it. It is the primary way of doing shaped crafting recipes in AE2. The molecular assembler itself does not need a channel, but remember that the interfaces connected to it will require a channel each. By default, it crafts slowly but can be sped up with acceleration cards.
Subnetworks
In general, a subnetwork is any network that is separate from the main network. They typically have very restricted or no access to the storage contents of the main network. Below are some specific kinds of subnets and their benefits. To transfer power between networks without connecting them logically, use quartz fibers.
Passive Subnetwork
When a storage bus on network A is adjacent to an interface on network B, network A can view the contents of network B because the interface exposes network B's contents. On the other hand, there is no mechanism for network B to see network A's contents. This "subnet connector" then prevents items from leaving network B unless the storage bus specifically extracts something. This is useful to prevent passive lines from overflowing their outputs into filling up main storage.
It is good practice to filter the storage bus to only the main products of the passive line on strict to prevent recycled materials and unnecessary byproducts from being made available to the main network. If material is needed from the main network, a reverse subnet connector with the storage bus filtered on extract only makes that available. To reduce lag at ZPM+, the interface on this reverse connector can be replaced by a Super Stock Replenisher from AE2FC.
Multiblock Recipe Subnetwork
Storage buses can be used on GregTech multiblock input hatches and buses on a subnetwork dedicated to that multiblock. Ingredients input into the network will seek a place to be stored, which ends up being the input hatches and buses. Ingredients can be inserted through an interface on this subnet, and are pushed by an interface with patterns on the mainnet, creating a "kissing interfaces" connector. Recipe outputs are directly sent to mainnet.
The Advanced Blocking Card on the subnet interface can expose the whole subnetwork as one inventory for the sake of blocking mode.
P2P Carrier Subnetwork
A separate network can be dedicated entirely to holding ME P2P tunnels to move around channels. The tunnel inputs are placed on the mainnet's controller faces and connected to tunnel outputs using the carrier subnet. One dense cable on the carrier subnet can then carry up to 1024 channels.
Examples
-
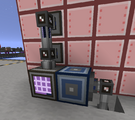 Autocrafting subnet with ME chest and storage bus
-
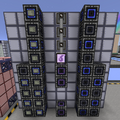 Assemblers with a subnet per circuit and a subnet with liquids in the center to share them
-
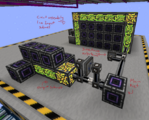 Circuit Assembly Line subnet and output subnet
Machines and AE2 Setups:
| Type | Description | Image |
| Setup for autocrafting using interfaces: | ||
| Autocrafting for single blocks using one interface each | After putting any single-block down, set the output on top using a wrench, then click the top part with a screwdriver, enabling "allow input from output side". Put an interface/dual interface on top to insert pattern, put it on "blocking mode" with "allow same recipe" enabled. Lastly, enable the single-block auto outputs. This is a Mainnet connection. |
|
| Items-only autocrafting | Item-only autocrafting, made with an interface facing an input bus. Enable it on "blocking mode" and "allow same recipe". This is a Mainnet Connection. | 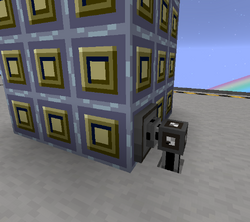 |
| Autocrafting using Ingredient buffer | The dual interface will insert items and fluids in the buffer that will be respectively taken by the input bus using a conveyor cover and fluid in the input hatch using an ender-IO cable. Enable on the interface "blocking mode" and "allow same recipe". This is a Mainnet connection. | 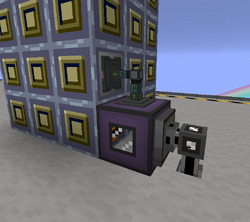 |
| Autocrafting using a subnetwork | The Dual Interface on the main network (black) inserts both items and fluids into the subnetwork (orange). The items are inserted into the Input Bus on the machine with a Storage Bus, while the fluids are inserted into the Input Hatch with a Fluid Storage Bus. To prevent conflicts, blocking mode should be enabled on the main network interface, and an Advanced Blocking Card should be placed in the subnetwork interface. The subnetwork is powered using Quartz Fiber, which passes AE2 power without connecting the two networks. This is an Inlet-only subnet. | 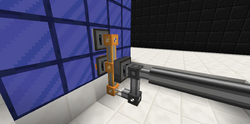 |
| Autocrafting using a subnetwork, with circuits | The Dual Interface on the main network (black) inserts both items and fluids into the item subnetworks (orange and green). The items are inserted into the Input Buses on the machine with a Storage Bus, and each Input Bus has the appropriate circuit. Each of these subnetworks stores its fluids into a shared fluid subnetwork (blue) using a Fluid Storage Bus into a Dual Interface, and this shared fluid subnetwork stores into the Input Hatch using another Fluid Storage Bus. To prevent conflicts, blocking mode should be enabled on the main network interface, and an Advanced Blocking Card should be placed in all subnetwork interfaces. All subnets are powered using Quartz Fiber. This is an Inlet-only subnet. | 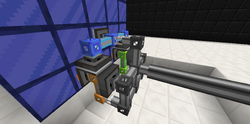 |
| To make passive LCRs, but can be applied to any passive Multiblock: | ||
| Setup for multiple machine inputs | At the start you can use ender-IO conduits to maximize interface usage, enabling you to use a dual interface to input and output multiple items and fluids in more than one machine. | 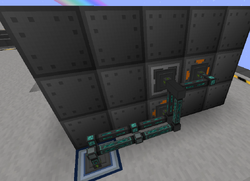 |
| Automatically stopping Multiblocks for passive fluids/items | Putting an output near the controller we can disable the machine when the respective AE2 tank is full. | 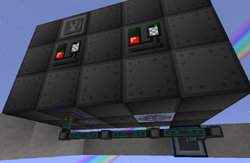 |
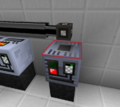
| Or we can put the output behind and setup a level emitter to enable/disable the multiblock. | 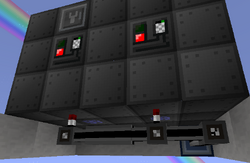 | |
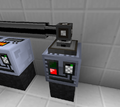
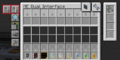
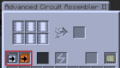
GregTech ME hatches
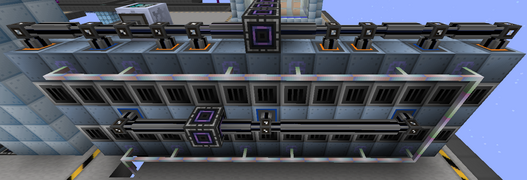
GT ME hatches allow for almost lag-free passive farms and autocrafting, so as soon you unlock them, try using them instead to help reduce TPS lag.
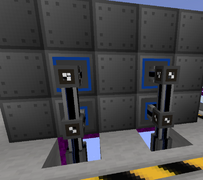
Normally these hatches "ME channels connect to front side only" but right-clicking them with a wire cutter enables "ME channels connect to any side" useful to use less cables. Examples below.
Stocking Input Buses and Hatches
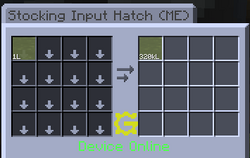
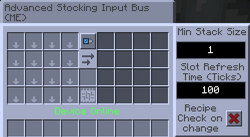
There are four types of ME input blocks available: the Stocking Input Bus and Advanced Stocking Input Bus for items, and the Stocking Input Hatch and Advanced Stocking Input Hatch for fluids. The basic versions of both have the ability to stock up to 16 distinct items or fluids from the connected ME system, making them available to machines for recipes. Unlike using an interface, stocking inputs do not actually move any items or fluids, which means that multiple stocking inputs on the same network can all draw from the same pool of that item or fluid, a behavior that is useful for parallelizing many machines.
The Advanced versions of both stocking inputs have an additional feature: an auto-pull mode. By enabling auto-pull, the block will check the connected ME network once every five seconds, and set its slots to the first 16 items/fluids it finds (by numeric ID). It can also be configured to check more or less often, to have a minimum quantity before pulling an item or fluid, and to run a recipe check every time it changes what it is pulling. Auto-pull should only be used on subnetworks with controlled item/fluid availability, but on those networks it has many uses: parallelizing expensive on-demand crafts like Volcanus arrays, passively processing more than 16 items at once in machines like the Industrial Centrifuge, and greatly improving throughput in Ore Processing, to name a few.
Output Bus (ME) and Output Hatch (ME)
The ME Output Bus stores items directly into ae2 when connected, and has a cache size that can be upgraded by inserting a storage cell or upgrading it on a crafting table using storage components. Does not have type limit. The ME Output Hatch is the same as a ME Output Bus but for fluids. See cached items in WAILA by hovering over the bus/hatch and sneaking.
Crafting Inputs
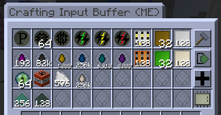
The Crafting Input Bus act like interfaces, allowing you to put patterns making a better lag-free option, but don't support fluids.
For fluids there's the Crafting Input Buffer (ME) that supports fluids and separates all recipes in different virtual inputs so the machines can't make another one by mistake.
Crafting Input Proxy don't require channels, has to be linked to other Crafting input to wallshare them, without actually wallsharing them.
Example passive setups and Autocrafting examples
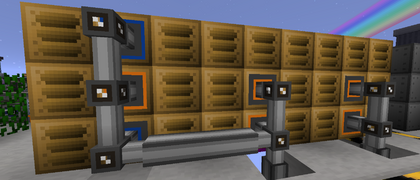
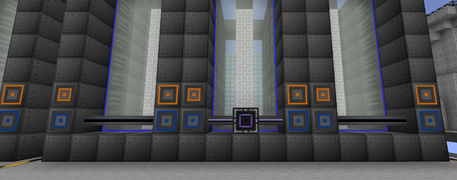
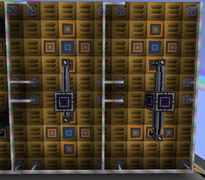
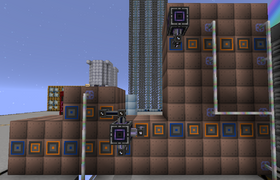
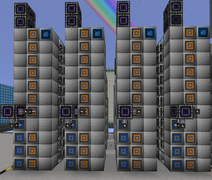
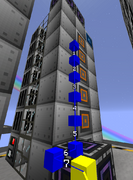
P2Ps
P2P tunnels can carry items, fluids, energy, redstone, and much more from one place to another without showing up on the rest of the network. In addition, they can bundle network channels to carry more channels from one point to another across a separate transport network.
For example, a normal P2P tunnel placed on an ME controller could carry one face worth of the ME controller's channels (32) and allow it to be accessed from another connected P2P tunnel. This can save a lot of resources used to make dense cables as large amounts of channels can be directly transported from one place to another using P2P tunnels that can receive channels from cheap cables like fluix cables. The P2P tunnel that faces the ME controller is considered as the "input" P2P, and the other one the "output".
To connect one P2P channel to another, crouch and right click on the "input" P2P with a memory card to copy its frequency and right click normally on the "output" P2P with the same memory card. Alternatively, right clicking with an advanced P2P card will open up a GUI allowing for the connection of P2P tunnels wirelessly. It also displays information of all P2P tunnels on the same network like their frequency and number of channels carried. The setting on the left can be used to change which P2P is the input and which is the output P2P. The card also allows for disconnection of connected P2P channels.
A quartz knife can be used to name P2Ps by right clicking the P2P with the knife. This can be useful if the player has many P2P channels on the same network.
P2P tunnels carry ME connections by default. They may be attuned to carry different things like energy or fluids by right-clicking the P2P with one of the following items (not consumed):
| P2P Tunnel Type | Item Needed |
| ME | Any AE2 cable |
| GT EU | Any GregTech Cable |
| Item | ME Storage/Import/Export Bus, Hopper, (Trapped) Chest |
| Fluid | Vanilla Buckets, most empty fluid containers (except Universal Cells) |
| Redstone | Redstone (Block or Dust), most vanilla redstone components |
| RF | Any Ender IO Capacitor Bank |
| Light | Torch, Glowstone (Block or Dust), Ender IO Powered Light |
| Sound | Noteblock, Jukebox, any vanilla Music Disc |
| OpenComputers | OC Cable, Adapter, Switch, Access Point, Network Card, Linked Card, Wireless Network Card, Analyzer |
Ender IO Conduits may also be used to attune a P2P tunnel to their relevant type (Item Conduit for Item, Energy Conduit for RF, etc).
Fluid P2P tunnels are able to transport fluids at an unlimited rate, here's an explanation of Fluid P2P tunnels.
GT EU P2P tunnels transfer power at a 5% loss. This means that the output p2p voltage is multiplied by 0.95, making lengthy full-amp recipes impossible to complete without some sort of buffer. The loss is not made up for by the network.
One very common and suggested way to properly setup P2Ps is to make them on a separate network apart from the main network. This is usually done by making another ME controller providing channels to the P2P tunnels (Yes, P2P tunnels need channels like everything else) and making a main ME controller covered with the P2P tunnels that are carrying the channels from the main controller.
Details here http://blog.mcmodguides.com/applied-energistics-2-part-2-cable-management/#P2P_Tunnels
ME (dual) interface tunnels
The P2P Tunnel - ME Interface and the P2P Tunnel - ME Dual Interface need to be crafted from a P2P tunnel and an interface. Individually they work like a normal ME (dual) interface, but additional interface tunnels can be linked to the first one, inheriting its patterns. This lets the system process the same patterns on multiple machines without the need for subnetworks or duplicate patterns. No separate channel is needed between the linked interfaces.
ME Quantum Ring
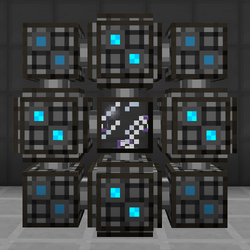
The ME Quantum Ring is a multiblock that can transport up to 32 channels wirelessly across any distance, and is the only way to connect an ME network across dimensions. Each Quantum ring is composed of one ME Quantum Link Chamber block in the center, surrounded by eight ME Quantum Ring blocks to form a 3x3 square in any orientation.
A pair of Quantum Rings are linked by placing a Quantum Entangled Singularity in each one. Quantum Entangled Singularities are always generated in pairs, which is done by throwing an AE2 Singularity (obtained using a Matter Condenser) and an Enderpearl Dust on the ground and subjecting them to any explosion.
Quantum Rings also draw 990 EU/t of power each, even when they are not linked, making them expensive to run early on. Quantum Rings can transport power when they are active, but in order to initially link a pair, both sides need to be powered, usually by bringing a charged Energy Cell for the destination. Both sides also need to be chunkloaded. If the ME network loses power, the link between a pair of Quantum Rings will be broken and have to be restarted by re-powering both sides; one way to work around this is by providing a source of power, such as with a Magic Energy Absorber or a singleblock generator fed by an Ender Tank, to an Energy Acceptor on the destination side. It is often a good idea to use a subnetwork on the other side of a Quantum Ring pair to work around the 32 channel limit.
Common uses for a Quantum Ring include:
- Linking the main base to outposts that need to be in a different dimension, such as Void Miners or Fluid Drilling Rigs.
- Linking to the network from the Spectre dimension, which can be used to access the network from anywhere, including across dimensions, using the Spectre Key.
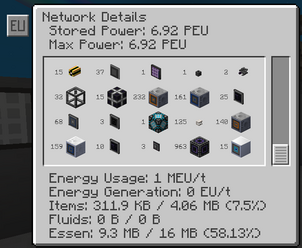
Nearly everything in AE2 requires power to run. Inserting/extracting items from the system also consumes some energy. ME systems, by default, use an energy type known as AE. The energy unit conversion is: 1 EU = 2 AE. Energy can be input either by connecting a GT wire/cable directly to an ME Controller, or by connecting it to an Energy Acceptor, which has the advantage of being placeable anywhere on the network.
Right clicking with an AE2 Network Tool onto any part of your ME system gives a detailed overview about the components in your system and their energy drain. Clicking the top-left button will further convert the default AE units into EU for ease of reading (since this pack mainly deals with GregTech EU).
When starting out, you can get away with using some EV amps to power the controller but Quantum Rings (2k EU/t) and wireless connectors are very power-hungry. It is also necessary to add Energy Cells to the network to create a buffer, to prevent power spikes from causing the system to run out of power.