GT New Horizons · GTNH Basics
Multiblock Machines
A Multiblock is a machine built from two or more blocks. Sizes range from small Vending Machines to massive superstructures like the Forge of the Gods. They typically serve a very specific purpose and are always better than their singleblock equivalent (ie. runs faster, better recipes), if one exists. Most multiblocks have their own unique casings and structure, but the input/output (I/O) of items, fluids, and energy is nearly universal. Items are transferred via buses, fluids are transferred via hatches, and power is transferred via energy/dynamo hatches. There is also the maintenance hatch for repairing the machine and the muffler hatch for releasing pollution. Use the tooltip, controller, and/or the Multiblock Structure Hologram Projector to see which buses/hatches are necessary and where they fit into the overall structure.
Multiblocks operate very similarly to singleblock machines, but there are a few distinct differences. First and foremost is that multiblocks void ingredients when they power fail. There is no restarting the recipe like in singleblocks; the ingredients just disappear, permanently. The multiblock also shuts down and has to be manually restarted when that happens. Periodically check your energy storage and disable any multiblocks or stop using them when energy levels are low. Also ensure that the entire multiblock is chunkloaded to avoid the controller loading in before the energy hatches.
 Important: | Not all multiblocks in GTNH are from GregTech. There are a select few from other mods (ie. Railcraft Boiler and Smeltery) that do not follow any of the information on this page. Visit their individual pages for more details. |
Controller
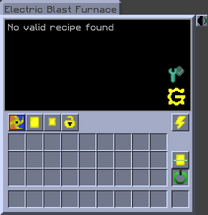
The controller is the heart of the multiblock. It determines the placement and orientation of the entire structure as well as the settings of the machine. Right-click the controller to open the GUI which contains the name of the machine at the top, the activity status, the maintenance status, a few configurable parameters, the power panel, and any manual overrides. The GUI also displays any issues with the structure such as a missing casing or input bus, usually with an option to highlight the location in the world. A short description of each configurable parameter and manual override is provided below.
When building or configuring many multiblocks, it is highly recommended to use some of the tool interactions and shortcuts listed below to change settings without ever having to enter the GUI of the controller. They all involve right-clicking the controller with some sort of GregTech Tool in hand which costs one durability but works very well with the Ring of Loki. The Matter Manipulator can also copy-paste multiblocks with all their saved settings too.
Configurable Parameters

|
Void Mode - Determines the behavior of the multiblock when there is no room in the output bus and/or output hatch. Choose to void only items, only fluids, or both. Void nothing temporarily pauses the machine until there is enough room for all outputs. |

|
Input Separation - Prevents SOLID ingredients in different input buses from being used in the same recipe, including programmed circuits. This is particularly useful for multiblocks with a high potential for recipe conflicts. Also try colored buses/hatches. |

|
Batch Mode - Run multiple of the same recipe as one long recipe, up to 6.4 seconds. This does NOT provide any sort of time discount or increase the throughput of the machine. The purpose is to reduce lag by lowering the number of recipe checks. |

|
Lock Recipe - Prevent the multiblock from running other recipes. This can be set while a multiblock is currently running, or prior to the desired recipe. |

|
Sound Muffling - Disable machine processing sounds. |
Manual Overrides

|
Power Panel - Configure the maximum number of parallels and whether to display the powerfail icon when the machine runs out of power during processing. |

|
Update Structure - Force a structure check. Multiblocks already do periodic structure checks, but this can save a few seconds (or minutes) of waiting. |

|
Power Switch - Enable or disable the multiblock. This does NOT interrupt active recipes. |
Tools

|
Multiblock Structure Hologram Projector - Right-click to visualize the multiblock. Sneak right-click to build the multiblock. Right-click the air to adjust any subchannels such as "coil" or "glass" which specifies the exact tier of those components. Does not have durability or power. |

|
Wrench - Right-click to rotate the controller and therefore the entire structure. Sneak right-click to flip the controller horizontally. |

|
Screwdriver - Right-click to toggle input separation. Also used to change the mode of certain multiblocks or disable animations. |

|
Wire Cutters - Right-click to toggle batch mode. |

|
Hammer - Right-click to toggle sound muffling. |

|
Soldering Iron - Right-click to set the redstone signal strength (strong/weak) of covers. This is not exclusive to controllers. |

|
Soft Mallet - Right-click to enable or disable the multiblock. |

|
Wrench of Erosion - Right-click to break down the multiblock and retrieve all the individual blocks. Available in six tiers from D-rank to SS-rank for increasing its speed. Does not have durability or power, but consumes mana in the process. |

|
Wrench of Evolution - An upgrade to the wrench of erosion with a filter for which block to remove. Sneak right-click to set the filter and then right-click to break down the multiblock as normal. Does not have durability or power, but consumes mana in the process. |
Power Panel
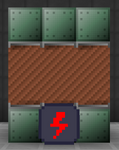
There are two options inside the power panel. The first is setting the maximum number of parallels which defaults to the maximum available. There is not much reason to ever lower it or manually set the value, unless there is a very specific situation that requires absolute precision over energy efficiency. The second option toggles powerfail events which includes the message in chat and the blinking powerfail indicator that appears when looking at the controller from a distance. Use the following commands to share powerfail events in Multiplayer and manage the powerfail indicators.
/sp invite <name>invites someone to join your SpaceProject team./sp acceptaccepts the invitation to the SpaceProject team./sp leaveleaves the current SpaceProject team./pf clearclears powerfail indicators across all dimensions./pf clear-dimclears powerfail indicators in the current dimension./pf listlists all current power outage information in chat including machine name, coordinates, and outage time./pf hidedisables powerfail indicators but messages still appear in chat when an outage occurs./pf showre-enables powerfail indicators./pf helplists all commands related to powerfails, or the same ones here.
Buses
Input and output buses are for inserting and extracting SOLID ingredients, respectively. Tell them apart by the direction of the orange arrows on their face side, as seen in the following images. Input buses do not automatically pull from adjacent inventories, but output buses automatically push to adjacent inventories, if one exists. The tier of the bus determines the total number of item slots and the type determines the total number of stacks per slot, as seen in the following table. Fluids and gases cannot be supplied via cells, buckets, or similar containers unless a recipe specifically requests that.

|
Input | 
|
Output |
Right-click an input bus with a screwdriver to toggle the filter which prevents any inputs without a use in the multiblock from entering the bus. Sneak right-click the input bus with a screwdriver to toggle sorting and limiting mode. Sorting mode constantly pushes items to the top-most slots while limiting mode prevents more than one stack of an item from entering the bus. There is also a filter in the GUI of output buses to lock them to specific items (drag from NEI).
| Tier | Slots | Regular | Compressed | Quantum | |||||||||
| Stacks/Slot | Total Stacks | Total Items | Stacks/Slot | Total Stacks | Total Items | Stacks/Slot | Total Stacks | Total Items | |||||
| ULV | 1 | 1 | 1 | 64 | ---- | ---- | ---- | ---- | ---- | ---- | |||
| LV | 4 | 1 | 4 | 256 | ---- | ---- | ---- | ---- | ---- | ---- | |||
| MV | 9 | 1 | 9 | 576 | ---- | ---- | ---- | ---- | ---- | ---- | |||
| HV | 16 | 1 | 16 | 1,024 | ---- | ---- | ---- | ---- | ---- | ---- | |||
| EV | 25 | 1 | 25 | 1,600 | ---- | ---- | ---- | ---- | ---- | ---- | |||
| IV | 36 | 1 | 36 | 2,304 | ---- | ---- | ---- | ---- | ---- | ---- | |||
| LuV | 49 | 1 | 49 | 3,136 | 256 | 12,544 | 802,816 | ---- | ---- | ---- | |||
| ZPM | 64 | 1 | 64 | 4,096 | 2,048 | 131,072 | 8,388,608 | ---- | ---- | ---- | |||
| UV | 81 | 1 | 81 | 5,184 | 16,384 | 1,327,104 | 84,934,656 | ---- | ---- | ---- | |||
| UHV | 100 | 1 | 100 | 6,400 | 131,072 | 13,107,200 | 838,860,800 | ---- | ---- | ---- | |||
| UEV | 121 | ---- | ---- | ---- | ---- | ---- | ---- | 2,097,152 | 253,755,392 | 16,240,345,088 | |||
| UIV | 144 | ---- | ---- | ---- | ---- | ---- | ---- | 33,554,432 | 4,831,838,208 | 309,237,645,312 | |||
| UMV | 169 | ---- | ---- | ---- | ---- | ---- | ---- | 137,438,953,472 | 23,227,183,136,768 | 1,486,539,720,753,150 | |||
| UXV | 196 | ---- | ---- | ---- | ---- | ---- | ---- | 144,115,188,075,856,000 | 28,246,576,862,867,800,000 | 1,807,780,919,223,540,000,000 | |||
Types

|
(S) Steam Bus - A primitive bus with up to one stack per slot and no auto-push feature. Only works with steam multiblocks. |

|
(LV) Regular Bus - The standard bus with up to one stack per slot and the auto-push feature. |

|
(LV) Void Bus - A type of output bus that voids up to four different types of items before they are sent to another output bus for retrieval. Set the filter by dragging in items from NEI. |

|
(LuV) Compressed Bus - An upgrade from the regular bus with up to 131k stacks per slot. However, they cannot be interacted with directly and requires some sort of automation. Contents are kept when broken. |

|
(UEV) Quantum Bus - An upgrade from the compressed bus with up to 257 stacks per slot. However, they cannot be interacted with directly and requires some sort of automation. Contents are kept when broken. |

|
(IV) Linked Input Bus - Shares its inventory with other linked input buses, similar to an ender chest. Left/right click with a data stick to copy/paste configurations and link them together. The link does not cross world boundaries. |

|
(EV) ME Output Bus - Pushes outputs directly to an AE2 network. There is an internal buffer but its capacity depends on the size of the inserted storage cell. The items in the buffer are not actually stored in the cell unless caching mode is enabled. |

|
(EV) ME Stocking Input Bus - Pulls inputs directly from an AE2 network to keep up to 16 item types in stock. Right-click with wire cutters to allow ME channels to connect to any side, including other buses/hatches. Left-right click with a data stick to copy/paste configurations. |

|
(LuV) ME Advanced Stocking Input Bus - An upgrade from the ME stocking input bus. Can auto-pull everything in a network rather than just the 16 filtered items with options to change the minimum stack size and slot refresh time. |

|
(LuV) Crafting Input Bus - Buffers inputs directly from an AE2 crafting request and immediately forces a recipe check. Does not support patterns with fluids and ignores the contents of other buses/hatches. Always takes priority over regular and stocking input buses. |

|
(UEV) Crafting Input Buffer - An upgrade from the crafting bus. Supports patterns with fluids and ignores the contents of other buses/hatches. Always takes priority over regular and stocking input buses. |

|
(UIV) Crafting Input Proxy - Link to a crafting input buffer/bus with a data stick to share contents, similar to an ender chest. Does not need to connect to an AE2 network or use any channels. |

|
Debug Input Bus - Creative only. Drag up to 16 items in from NEI to buffer 2B of each for testing. The items are also never actually consumed. Alternatively, use the infinite item chest or a drawer with a creative vending upgrade. |
Hatches
Input and output hatches are for inserting and extracting FLUID ingredients, respectively. Tell them apart by the direction of the blue arrows on their face side, as seen in the following images. Input Hatches do not automatically pull from adjacent inventories, but output hatches automatically push to adjacent inventories, if one exists. The tier of the hatch determines the available capacity, as seen in the following table. One trick is to insert large fluid cells into an input hatch to automatically fill it as it empties, effectively increasing its capacity.

|
Input | 
|
Output |
Right-click an input hatch with a screwdriver to toggle the filter which prevents any inputs without a use in the multiblock from entering the hatch. Right-click an output hatch with a screwdriver to cycle modes or what exactly it can output. The most common mode is steam and miscellaneous fluids to prevent items from getting stuck there, but output buses always have priority over output hatches anyway. There is also a filter in the GUI of output hatches to lock them to specific fluids (drag from NEI).
| Tier | Capacity | |
| Regular | Quadruple (per) | |
| ULV | 8,000 L | ---- |
| LV | 16,000 L | ---- |
| MV | 32,000 L | ---- |
| HV | 64,000 L | ---- |
| EV | 128,000 L | 32,000 L |
| IV | 256,000 L | 64,000 L |
| LuV | 512,000 L | 128,000 L |
| ZPM | 1,024,000 L | 256,000 L |
| UV | 2,048,000 L | 512,000 L |
| UHV | 4,096,000 L | 1,024,000 L |
| UEV | 8,192,000 L | 2,048,000 L |
| UIV | 16,384,000 L | 4,096,000 L |
| UMV | 32,768,000 L | 8,192,000 L |
| UXV | 65,536,000 L | 16,384,000 L |
| Humongous | 2,000,000,000 L | 500,000,000 L |
Types

|
(S) Steam Hatch - A primitive hatch for specifically steam and steam multiblocks. |

|
(LV) Regular Hatch - The standard hatch with the auto-push feature. |

|
(LV) Void Hatch - A type of output hatch that voids a single type of fluid before its sent to another output hatch for retrieval. Set the filter by dragging in a fluid from NEI. |

|
(EV) Quadruple Input Hatch - An upgrade from the regular hatch that can hold up to four different fluids simultaneously at 1/4th the capacity of a regular hatch of the same tier. Pair these together with quadruple fluids pipes for fluid transportation. |

|
(HV) Liquid Air Fluid Hatch - A regular input hatch with 100,000,000 L capacity but limited to liquid air specifically. Used exclusively for processing liquid air in a Distillation Tower. |

|
(HV) Giant Output Hatch - A regular output hatch with 100,000,000 L capacity but with no input equivalent. Intended for processing liquid air in a Distillation Tower, but can be used for anything. |

|
(EV) Reservoir Hatch - Buffers up to 2,000,000,000 L of water for multiblocks. Automatically refills to max capacity every 5 seconds. |

|
(IV) Air Intake Hatch - Pulls air in from the surrounding environment, such as regular air from the Overworld, nether air from the Nether, and toxic air from the Toxic Everglades. Available in three tiers. |

|
(IV) Essentia Output Hatch - Buffers up to 256 total essentia and pushes outputs to any connected essentia tubes or a warded jar directly below the hatch. |

|
(IV) ME Essentia Output Hatch - Pushes essentia directly to an AE2 network. There is no internal buffer but it still connects to essentia tubes or a warded jar directly below the hatch. |

|
(EV) ME Output Hatch - Pushes outputs directly to an AE2 network. There is an internal buffer but its capacity depends on the size of the inserted storage cell. The fluids in the buffer are not actually stored in the cell unless caching mode is enabled. |

|
(UV) ME Stocking Input Hatch - Pulls inputs directly from an AE2 network to keep up to 16 item types in stock. Right-click with wire cutters to allow ME channels to connect to any side, including other buses/hatches. Left-right click with a data stick to copy/paste configurations. |

|
(UHV) ME Advanced Stocking Input Hatch - An upgrade from the ME stocking input hatch. Can auto-pull everything in a network rather than just the 16 filtered fluids with options to change the minimum size and slot refresh time. |

|
Debug Input Hatch - Creative only. Drag up to 16 fluids in from NEI to buffer 2B of each for testing. The fluids are also never actually consumed. Alternatively try the debug fluid tank or infinite fluid tank. |
Energy & Dynamo Hatches
Energy and dynamo hatches are for inserting and extracting POWER, respectively. Tell them apart by the fill on their face side, as seen in the following images. Energy hatches automatically pull power from sources to fill its own internal buffer and process recipes. Dynamo hatches automatically push power from their internal buffer to any sinks/storages, if one exists. The tier of the hatch determines the voltage, the type determines the amperage, and together they determine the max throughput (EU/t) and buffer size (EU). Be very careful to use the correct voltage and amperage otherwise cables could burn, ingredients could void, and machines could explode.

|
Energy | 
|
Dynamo |
Energy and dynamo hatches do not have any tool shortcuts or even a GUI. Right-click them with a Portable Scanner to view their max throughput and current energy buffer. Most energy and dynamo hatches do not suffer any passive power loss, other than lasers which continuously lose from their buffer regardless of the amount of power flowing through. For example, a 256A laser source hatch and 256A laser target hatch both passively lose 256 EU/s until their buffer is completely empty.
| Tier | Base EU/t | Regular (EU/t) | Multi-Amp (EU/t) | Laser (EU/t) | |||||||||||||||
| 2A | 4A | 16A | 64A | 256A | 256A | 1,024A | 4,096A | 16,384A | 65,536A | 262,144A | 1,048,576 A | 4,194,304 A | 16,777,216 A | Legendary | |||||
| ULV | 8 | 16 | ---- | ---- | ---- | ---- | ---- | ---- | ---- | ---- | ---- | ---- | ---- | ---- | ---- | ---- | |||
| LV | 32 | 64 | ---- | ---- | ---- | ---- | ---- | ---- | ---- | ---- | ---- | ---- | ---- | ---- | ---- | ---- | |||
| MV | 128 | 256 | ---- | ---- | ---- | ---- | ---- | ---- | ---- | ---- | ---- | ---- | ---- | ---- | ---- | ---- | |||
| HV | 512 | 1,024 | 2,048 | ---- | ---- | ---- | ---- | ---- | ---- | ---- | ---- | ---- | ---- | ---- | ---- | ---- | |||
| EV | 2,048 | 4,096 | 8,192 | 32,768 | 131,072 | ---- | ---- | ---- | ---- | ---- | ---- | ---- | ---- | ---- | ---- | ---- | |||
| IV | 8,192 | 16,384 | 32,768 | 131,072 | 524,288 | ---- | 2,097,152 | ---- | ---- | ---- | ---- | ---- | ---- | ---- | ---- | ---- | |||
| LuV | 32,768 | 65,536 | 131,072 | 524,288 | 2,097,152 | ---- | 8,388,608 | 33,554,432 | ---- | ---- | ---- | ---- | ---- | ---- | ---- | ---- | |||
| ZPM | 131,072 | 262,144 | 524,288 | 2,097,152 | 8,388,608 | ---- | 33,554,432 | 134,217,728 | 536,870,912 | ---- | ---- | ---- | ---- | ---- | ---- | ---- | |||
| UV | 524,288 | 1,048,576 | 2,097,152 | 8,388,608 | 33,554,432 | 134,217,728 | 134,217,728 | 536,870,912 | 2,147,483,648 | 8,589,934,592 | ---- | ---- | ---- | ---- | ---- | ---- | |||
| UHV | 2,097,152 | 4,194,304 | 8,388,608 | 33,554,432 | 134,217,728 | 536,870,912 | 536,870,912 | 2,147,483,648 | 8,589,934,592 | 34,359,738,368 | 137,438,953,472 | ---- | ---- | ---- | ---- | ---- | |||
| UEV | 8,388,608 | 16,777,216 | 33,554,432 | 134,217,728 | 536,870,912 | 2,147,483,648 | 2,147,483,648 | 8,589,934,592 | 34,359,738,368 | 137,438,953,472 | 549,755,813,888 | 2,199,023,255,552 | ---- | ---- | ---- | ---- | |||
| UIV | 33,554,432 | 67,108,864 | 134,217,728 | 536,870,912 | 2,147,483,648 | 8,589,934,592 | 8,589,934,592 | 34,359,738,368 | 137,438,953,472 | 549,755,813,888 | 2,199,023,255,552 | 8,796,093,022,208 | 35,184,372,088,832 | ---- | ---- | ---- | |||
| UMV | 134,217,728 | 268,435,456 | 536,870,912 | 2,147,483,648 | 8,589,934,592 | 34,359,738,368 | 34,359,738,368 | 137,438,953,472 | 549,755,813,888 | 2,199,023,255,552 | 8,796,093,022,208 | 35,184,372,088,832 | 140,737,488,355,328 | 562,949,953,421,312 | ---- | ---- | |||
| UXV | 536,870,912 | 1,073,741,824 | 2,147,483,648 | 8,589,934,592 | 34,359,738,368 | 137,438,953,472 | 137,438,953,472 | 549,755,813,888 | 2,199,023,255,552 | 8,796,093,022,208 | 35,184,372,088,832 | 140,737,488,355,328 | 562,949,953,421,312 | 2,251,799,813,685,250 | 9,007,199,254,740,990 | 288,230,376,151,712,000 | |||
Types

|
(LV) Regular Hatch - The standard hatch with up to 2A input for energy hatches and 1A output for dynamo hatches. |

|
(HV) Multi-Amp Hatch - An upgrade from regular hatch with up to 64A input for energy hatches and 256A output for dynamo hatches. Available in 4A, 16A, 64A, and 256A versions. |

|
(IV) Laser Hatch - An upgrade from the multi-amp hatch with up to 16,777,216A throughput for both energy and dynamo hatches. Requires laser vacuum pipes and is therefore incompatible with cables/wires. Color the hatches and pipes with a spray can to connect them. |

|
(UIV) Wireless Hatch - Connects directly to the wireless EU network for uploading/downloading power. Does not connect to wires. Available in regular, multi-amp, and even laser versions. Also has a cover equivalent. |

|
Debug Energy Hatch - Creative only. Set the voltage and amps through the GUI of the hatch. The energy buffer is fixed at 9.22e18 EU and completely refills every 600 ticks by default. Also try the debug power generator. |
Maintenance Hatch
The maintenance hatch is for repairing any maintenance issues, or random occurences that multiply the power consumption of the multiblock by , where is the number of its maintenance issues. There are six different maintenance issues in total and having all of them simultaneously is enough to disable the machine. Each one corresponds to a very specific GregTech Tool, as seen in the following image from the GUI of the controller. From left-to-right, there is the crowbar, hammer, screwdriver, soft mallet, soldering iron, and wrench. WAILA also displays ** HAS PROBLEMS ** while looking at the controller. Multiblocks without maintenance hatches ignore this mechanic entirely.

There is a 1 in 6,000 chance every 50 seconds of runtime for a new maintenance issue to appear, regardless of the type of maintenance hatch. That is an average of 300,000 seconds or 83.3 hours of runtime between maintenance issues. Disabled or idle multiblocks do not increase runtime and therefore do not generate any maintenance issues or increase the likelihood of one occurring as soon as it resumes processing.
Repair maintenance issues by opening the maintenance hatch, picking up the necessary tool, and left-clicking the center button. This consumes a small amount of durability and/or charge with every use and only applies to one multiblock at a time if there are multiple sharing the same hatch.
Types

|
(LV) Maintenance Hatch - The standard hatch with a GUI for making repairs. |

|
(LuV) Auto Maintenance Hatch - An upgrade from the regular hatch that can automatically repair issues with 4 duct tape, 2 lubricant cells, 4 steel screws, and 2 HV circuits each. The GUI has four slots for each of the four different items and does not support manual repairs. |

|
(UV) Auto-Taping Maintenance Hatch - An upgrade from the auto maintenance hatch that automatically repairs all maintenance issues for free. The permanent solution to maintenance. |

|
(EV) Vis-Regulated Maintenance Hatch - A magical alternative to the auto maintenance hatch that automatically repairs all maintenance issues with 2,500 centi-vis of each type. |

|
(IV) Drone Downlink Module - Connects to a nearby Drone Centre and automatically repairs any maintenance issues for free if there is an active drone. However, drones have a chance to crash and void every second. Also supports remote control from the Drone Centre. |
Tools

|
(LV) Field Engineer's Toolbox - A portable container with slots for all the different types of tools, a battery to charge them, and six slots for miscellaneous items such as fine soldering alloy wire. Right-click a maintenance hatch to repair all issues with one click. |

|
(LV) BrainTech Aerospace Advanced Reinforced Duct Tape FAL-84 - An item that repairs all maintenance issues with a single click but is consumed in the process. Visually adds duct tape around the maintenance hatch but it has no effect. |

|
(HV) Wand Focus: Maintenance - A magical alternative to GT Tools. Add to a wand and repair all maintanenance issues with a single cast at the cost of 25 ignis, ordo, and terra. Vis discounts and the frugal focus upgrade can reduce the cost. |
Muffler Hatch
The muffler hatch releases pollution from the machine. There must be at least one block of air in front of the muffler hatch in order for the multiblock to function. Even pipes and wires are considered an obstruction. The amount of pollution generated depends on the multiblock and the tier of the muffler hatch, as seen in the following table and NEI. Muffler hatches are still required if pollution is disabled, but their tier is no longer relevant. Remove pollution from the environment with pollution air scrubbers or the Electric Air Filter. The former is a basic singleblock and the latter is an LV tier multiblock that scales with the number and tier of muffler hatches in its structure. If left unchecked, pollution can cause serious negative effects such as debuffing the player, destroying plant life, and eroding terrain. Pollution dissipates naturally over time, but not enough to counteract a rising industrial complex.
| Tier | Pollution | |
| Regular | Advanced | |
| LV | 100% | 95% |
| MV | 87% | 64% |
| HV | 75% | 40% |
| EV | 62% | 26% |
| IV | 50% | 16% |
| LuV | 37% | 10% |
| ZPM | 25% | 6% |
| UV | 12% | 4% |
| UHV | 0% | 0% |
Types

|
(LV) Muffler Hatch - The standard hatch for releasing pollution. Requires one block of air in front to function. |

|
(LV) Advanced Muffler Hatch - An upgrade from the standard hatch that requires three blocks of air in front and an air filter to produce less than 100% pollution. IV+ hatches specifically require T2 air filters which have a 17.4h lifespan over the normal 20.8m lifespan. |
Wallsharing
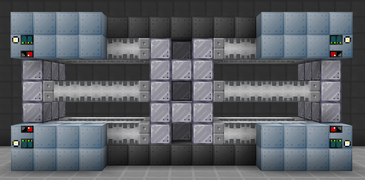
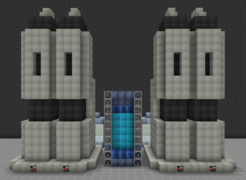
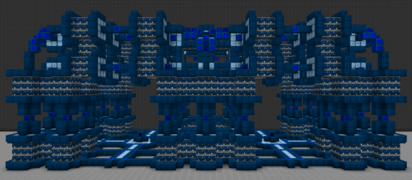
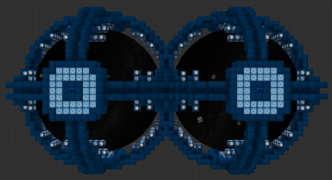
A unique property of GregTech multiblocks is their ability to wallshare parts of their structure to save on casings, glass, heating coils, buses/hatches, and more. Simply overlap structures to allow multiple machines to use the same block(s) simultaneously. There are very few exceptions where that is not beneficial and is therefore extremely useful throughout the entire game, whether building a second Electric Blast Furnace or a second Eye of Harmony.
Maintenance and muffler hatches are always safe to share, but be careful when sharing energy hatches because they can only pull up to 2A of power. Ensure that the recipes for a multiblock do not exceed 1A of power and repair maintenance issues as soon as possible, or else the additional power cost could cause both machines to powerfail.
-
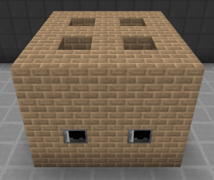 Bricked Blast Furnaces
-
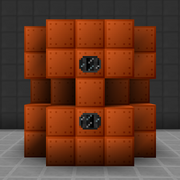 Steam Separators
-
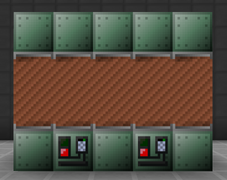 Electric Blast Furnaces
-
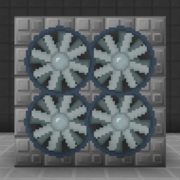 Large Steam Turbines
-
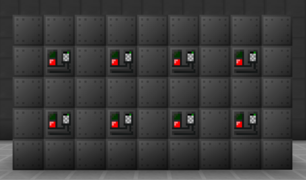 Large Chemical Reactors
-
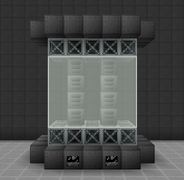 LATEXs
-
 Industrial Extrusion Machines
-
 PCB Factories
-
 Dimensionally Transcendent Plasma Forges
-
 Eyes of Harmony
Overclocking
An overclock (OC) occurs when the supplied power is at least 1 voltage tier higher than required by the recipe. Singleblocks can only achieve this with higher tier machines, but multiblocks can use higher tier and/or multiple energy hatches. Overclocking is first encountered when using the Electric Blast Furnace; two energy hatches are needed to supply 4A of LV power, simulating 1A of MV power. There are two different types of overclocks and the one used depends on the multiblock itself, as seen in the following table. Those under "mixed" can use both in the same recipe or depends on an upgrade. Those under "unique" follow their own special rules and do not fit into either category.
- Imperfect Overclocks - 2x speed for 4x power (2/4). This is the standard behavior for most multiblocks. For example, consider a recipe that normally takes 128 EU/t and 60s to run for a total of 153,600 EU. An imperfect overclock changes that to 512 EU/t and 30s to run for a total of 307,200 EU. Notice that the total energy is doubled which means the extra speed may not always be worth the additional power cost. Alternatively, build more of the same multiblock at the same voltage tier to provide the same effect for half the power.
- Perfect Overclocks - 4x speed for 4x power (4/4). The total energy remains the same so there is no downside to increasing the supplied voltage/amperage. The only reason to build multiple of the same multiblock with perfect overclocks is when there is not enough room for additional energy hatches. Very few multiblocks allow perfect overclocks and sometimes they are only 2/2 instead.
Overclocking is only possible down to 1 tick because that is the smallest unit of time in Minecraft, but nearly every multiblock in GTNH is capable of subticking or increasing its number of parallels by a corresponding amount to simulate additional overclocks. For example, if a machine is processing 1 item per tick, then the next imperfect overclock would process 2 items per tick. The throughput gain is effectively identical to the normal speed boost without breaking the 1 tick time barrier.
Parallels
A parallel is a multiple of a recipe that runs concurrently with the original. Parallels increase the throughput and power consumption of a multiblock without increasing the overall length of the recipe. Two parallels, for example, doubles the EU/t to process twice the number of inputs at the same time. The total EU remains the same, as with perfect overclocks, which means parallels are perfectly energy efficient and very powerful. Note that adding parallels is NOT the same as increasing the batch size--the latter is only for improving TPS and does not increase the throughput of the multiblock.
- Batch Size - More recipes per iteration, same EU/t, longer duration.
- Parallels - More recipes per iteration, higher EU/t, same duration.
Parallels are calculated AFTER energy discounts and BEFORE overclocks. Consider a recipe that consumes 2,000 EU/t over 22 seconds in the Volcanus which runs at 220% speed, only uses 90% of the EU/t normally required, and offers 8 parallels.
- The speed boost and energy discount first reduces the base recipe to over 10 seconds.
- If there is enough power for the maximum number of parallels then the recipe becomes over 10 seconds.
- If there is still enough power to grant a perfect overclock then the recipe becomes over 2.50 seconds.
- If there is still enough power to grant an imperfect overclock then the recipe becomes over 1.25 seconds.
The following equation summarizes the relationship between all the variables. Follow it top-to-bottom based on the available power. For multiblocks without additional parallels, set parallels = 1 and skip the middle expression.
Priority
Multiblocks choose which recipe to process next based on a priority system. Typically that involves processing the same recipe that is currently running, but there are a few other unique interactions and overrides to be aware of. This section does not cover all possible combinations of buses/hatches because most are not deterministic.
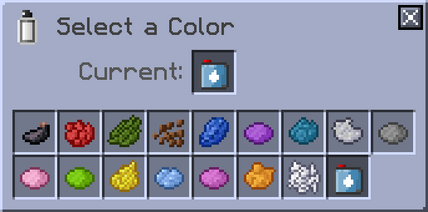
Colored buses/hatches always follow the order in the image below, and apply input separation to both solids and liquids. Black has the highest priority and white has the lowest which means if there were inputs in both, then the multiblock would always choose the former over the latter regardless of what is currently running. This is particularly useful for machines like the Dimensionally Transcendent Plasma Forge which could be running a lower-priority passive recipe and occasionally needs to swap to a higher-priority active recipe. Uncolored buses/hatches are sort of a wildcard because they do not follow the same priority or input separation rules. Their contents are available to all and if a multiblock had to choose between a colored and uncolored bus/hatch then it would base it off another factor rather than color.
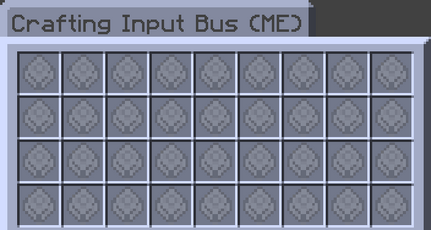
Crafting input buses, buffers, and proxies all take priority over regular and stocking buses/hatches regardless of what is currently running. Again, this is particularly useful when running a lower-priority passive recipe with a stocking hatch and occasionally need to swap to a higher-priority active recipe with a crafting bus. Furthermore, recipes inside the crafting bus follow the order of their patterns and have input separation between them. Those in the top left have the highest priority and those in the bottom right have the lowest. It is highly recommended to set up a priority rotation based on this information in the late game. For example, have one set of Industrial Cutting Factories prioritize bolts and another set prioritize ICs, but make all recipes available to both. That way one does not have to wait for the other to finish processing, and any subsequent crafts with both bolts and ICs can begin sooner rather than later.
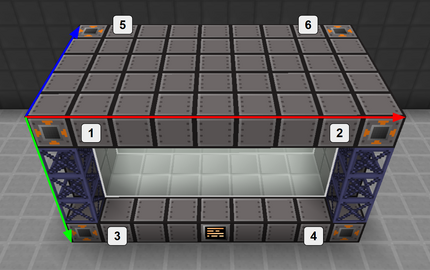
The location of the bus/hatch can also sometimes determine priority, but it is not as consistent or precise and is always overridden by the other types of priority if applicable. Location priority follows the order in which a multiblock is built which is typically front-to-back, top-to-bottom, and left-to-right. The exact directions can vary, especially when rotating or flipping the multiblock, but a trick is to set the Multiblock Structure Hologram Projector's budget to 1 and slowly build out the structure very deliberately to track the order. The following image is an example with an input bus at each corner of the Precise Auto-Assembler MT-3662. Location priority would follow the numbers 1-6, or more generally the red, green, and then blue arrows.
Troubleshooting
If a multiblock is not working, the first thing to do is open the controller for a clue on what is wrong. The following are some common error messages and what they could mean. If all else fails, reread the tooltip and the construction requirements on the wiki before rebuilding the entire multiblock with the Multiblock Structure Hologram Projector.
| ** HAS PROBLEMS ** | ** INCOMPLETE STRUCTURE ** |
|
|
| Does Not Turn On | Turns On then Voids / Shuts Down |
|
|
| Wrong Output | Voids at Random / Runs Intermittently |
|
|
| Needs More Power | Overflowed |
|
|
| Not Enough Output Space | No Valid Recipe Found |
|
|