GT New Horizons · Crops & farming
CropsNH
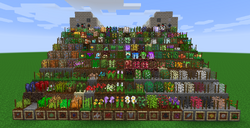
CropsNH is a feature added for Version 2.9.0. It is a custom crop system that takes inspiration from and replaces IC2 Crops, which was previously used in GTNH Version 2.8.4 and earlier.
CropsNH is first available starting in the Stone Age, and becomes rapidly more powerful and versatile, most notably in MV with the unlock of the Industrial Farm. Crop outputs can be used to 4x most ores in the game, and passively generate nearly every major resource up to LuV. Similar to Bees, crops have both stats and mutations. Lower tier crops combined via breeding to create more exotic, higher tier species.
Mechanics
Crops from CropsNH must be planted on crop sticks in order to function and grow. Crop sticks can only be placed on blocks that are registered as valid soils; each crop then has its own additional required soil type(s) in order to be planted. Certain crops may also require a secondary block beneath their soil block. Crop sticks can be doubled by placing another crop stick onto an existing empty one; this is required in order for crops to breed or propagate.
Breeding and Propagation
Crops can spread and breed by utilizing doubled crop sticks placed around the crops. Every growth cycle, whenever a mature crop is next to a double crop stick, it will attempt to either propagate, or, if there is another mature crop also next to the double crop stick, attempt to breed. If there is only one mature crop next to a double crop stick, then it will always attempt to propagate. If there are two or more mature crops next to a double crop stick, then it will roll a 50/50 coin flip to determine whether it will propagate or breed.
When propagation occurs, the double crop stick chooses one of the nearby mature crops, and replicates an immature version of that crop, starting at 0% maturity. Even if there are multiple valid crops to propagate from, it will always only take stats from one of the crops.
When breeding occurs, a few processes are done. First, all crops are checked and referenced to see if there are any deterministic mutations. If there are multiple deterministic mutations, it picks one at random. Then, the crop stick is checked to see if the selected crop is valid (e.g. correct light level, valid soil, etc.). If the chosen crop fails this check, then other possible deterministic mutations are ignored, and the crop does not plant, and no breeding occurs. However, if no deterministic mutation is initially found, then it moves on to mutation pools.
All crops possess multiple mutation pools, generally correlating with the crop's attributes (e.g. fruits, reeds, nether crops, end crops, ore berries, gems, etc.) If multiple valid pools are found, it picks one at random. When a pool is selected, the game picks a crop from that pool randomly, and attempts to plant it. If the planting fails, then no breeding occurs for that growth cycle, and the crop will remain empty, even if there are other possible crops that could have been planted. This can make breeding for a specific crop that has many possible mutations relatively time-consuming.
When either propagation or breeding successfully occurs, new stats are calculated for the resulting crop, based on how much fertilizer the parent crop(s) contain. To add fertilizer to a crop, a player can use bonemeal, which will add 5 points of fertilizer up to 30, or the fertilizer item, which will add 100 points of fertilizer, capping out at 100. By default, the fertilizer thresholds for both propagating and breeding crops are the same, with the medium threshold at 50 fertilizer and the high threshold at the manual fertilizer storage limit (default 100) plus one. The effect of this is that it is not possible to achieve the high fertilizer threshold without a crop manager.
The stat change of a new crop is shown in the table below. When a breeding or propagation event occurs, for each stat of the new plant, the game randomly selects one of the bracketed values based on the amount of fertilizer in the parent with the least fertilizer.
| Fertilizer amount | Low (0-49) | Medium (50-100) | High (101-200) |
| Stat Change
(Propagating) |
{ -1 0 1 } | { 0 } | { 0 0 0 0 1 2 3 4} |
|---|---|---|---|
| Stat Change
(Breeding) |
{ -1 -1 0 1 1 } | { -2 -1 0 1 2 } | { 0 0 0 0 1 2 3 4} |
Crop Stats
All crops have four base stats, listed below. The first three range from 1-31 while tier ranges from 1-16. These stats and any environmental factors first determine the nutrient score of the crop which then determines its overall growth speed and production. Crops update once every 256 ticks (12.8 seconds) unless boosted with a World Accelerator and a lot of power. It is highly recommended to switch to the Industrial Farm as soon as possible because it automatically maxes a few of the environmental bonuses and offers upgrades to further enhance the speed and production of crops.
- Growth: Determines the growth speed of the crop.
- Gain: Determines the amount of outputs when harvesting a crop.
- Resistance: Reduces the likelihood of crops becoming sick. Renders crops immune to sickness at the maximum 31 resistance.
- Tier: Reduces the growth speed of the crop and demands better stats/conditions as it gets higher to prevent sickness.
Nutrients
The nutrient score of a crop depends on five unique bonuses, as seen in the following equations. The absolute minimum value is 5 and the maximum value is 55. View the current water and fertilizer storage values through WAILA when looking at the crop, or by using a portable scanner on it. Use a watering can to increase the water storage manually, or a crop manager to increase both the water and fertilizer storage automatically. Crops can still see the sky if there is a transparent or partial block above it, such as glass or a fence post. The current humidity of the biome is visible in the XML info overlay and the biome preferences are listed in NEI. The humidity bonus only applies if no biome preferences are met. Easily change biomes with Witchery's brew of shifting seasons, Thaumcraft's arcane terrestrial reformer, or Bloodmagic's ritual of gaia's transformation.
Growth Points
Next, use the following equation to calculate the total amount of growth points added to the crop at the end of the current cycle. Growth speed increases with the crop's Growth stat () and nutrient score, but decreases with the crop's Tier (). If the growth speed is ever less than or equal to zero, then the crop cannot grow and has a chance to become sick. Crops with the maximum 31 resistance are at least immune to the sickness debuff but they are still useless in that case.
The following table provides some example calculations for various growth stats, nutrient values, and crop tiers. Notice that only T1-T4 crops can grow with the minimum nutrient score of 5 but all crops can grow with a nutrient score of 41. Also notice that the difference between growth 1 and growth 31 is approximately 540% which makes it a very important stat to increase. See the table in the last section for the total growth points of each crop.
| Crop Stats | +Growth Points / Cycle vs. Crop Tier | ||||||||||||||
| Growth | Nutrients | T1 | T2 | T3 | T4 | T5 | T6 | T7 | T8 | T9 | T10 | T11 | T12 | T13 | T16 |
| 1 | 5 | 8 | 7 | 5 | 2 | 0 | 0 | 0 | 0 | 0 | 0 | 0 | 0 | 0 | 0 |
| 16 | 5 | 25 | 23 | 17 | 8 | 0 | 0 | 0 | 0 | 0 | 0 | 0 | 0 | 0 | 0 |
| 31 | 5 | 42 | 38 | 29 | 14 | 0 | 0 | 0 | 0 | 0 | 0 | 0 | 0 | 0 | 0 |
| 1 | 17 | 12 | 11 | 10 | 10 | 9 | 8 | 8 | 7 | 5 | 2 | 0 | 0 | 0 | 0 |
| 16 | 17 | 38 | 36 | 34 | 31 | 29 | 27 | 25 | 23 | 17 | 8 | 0 | 0 | 0 | 0 |
| 31 | 17 | 64 | 61 | 57 | 53 | 49 | 46 | 42 | 38 | 29 | 14 | 0 | 0 | 0 | 0 |
| 1 | 41 | 20 | 19 | 19 | 18 | 17 | 17 | 16 | 15 | 15 | 14 | 13 | 12 | 12 | 10 |
| 16 | 41 | 64 | 62 | 60 | 58 | 56 | 53 | 51 | 49 | 47 | 45 | 42 | 40 | 38 | 31 |
| 31 | 41 | 109 | 105 | 101 | 98 | 94 | 90 | 86 | 83 | 79 | 75 | 72 | 68 | 64 | 53 |
| 1 | 55 | 25 | 24 | 24 | 23 | 22 | 22 | 21 | 20 | 19 | 19 | 18 | 17 | 17 | 15 |
| 16 | 55 | 80 | 78 | 75 | 73 | 71 | 69 | 67 | 64 | 62 | 60 | 58 | 56 | 53 | 47 |
| 31 | 55 | 135 | 131 | 127 | 123 | 120 | 116 | 112 | 109 | 105 | 101 | 98 | 94 | 90 | 79 |
Tier
Each crop has an assigned tier, generally correlating with the complexity of the crop's breeding requirements. Given that tier affects nutrient demand, this results in a few breakpoints:
Tier 4 is the last tier that crops can be planted anywhere and grow, without any extra nutrient influences.
Tier 5 is the last tier that crops can be planted anywhere and grow if they can see the sky (7 Nutrient score), without any extra nutrient influences.
Tier 11 is the last tier that crops can be planted anywhere and grow if they are in a biome with at least 80% humidity (19 Nutrient score), without any extra nutrient influences.
Tier 12 is the last tier that crops can be planted anywhere and grow if they can see the sky and they are in a biome with at least 80% humidity (21 Nutrient score), without any extra nutrient influences.
Growth
The growth stat is the first of the three seed-based stats that can be increased by proliferation and breeding. It, alongside Gain and Resistance, have a stat range of 1-31.
Growth affects the baseline growth rate of crops according to this formula:
This is then multiplied by the nutrient-dependent growth multiplier:
This speed value is what contributes to the crop's Growth Points requirement. Once the growth point number is cumulatively reached, the crop becomes mature and harvestable.
Gain
The Gain stat determines the yield of a crop if it is successfully harvested.
When a crop is harvested, the game calculates how many "rounds" of drops it processes, according to this formula:
The number of drop rounds indicates how many times the game will give out drops. For any remainder, it is calculated as a percentage (e.g. a drop round count of 3.4 will give three rounds with a 40% chance of a fourth). Once the number of rounds is determined, the game loops through a drop formula:
This means that each successful drop roll is run against its drop chance in the loot table, and added as a successful drop if it succeeds. For each successful roll, a bonus is given based on the gain stat:
The total yield of a harvest is thus calculated:
The maximum harvest bonus translates out to ~2.5x per harvest, at 31 gain.
Resistance
Resistance determines a crop's resilience against weeds, sickness, trampling, and the chance to recover a seed when the crop is destroyed.
Sickness
If a crop's growth speed multiplier (determined by Growth and Nutrients) hits or drops to 0, the crop rolls a resistance check each growth cycle:
If the crop fails this check, it becomes sick. A sick crop stops growing and attempts to infect neighboring crops every growth cycle; those neighbors also roll resistance checks to avoid becoming sick. This can cascade and grind an entire field to a halt if not treated with Weed-Ex.
A crop with Resistance 31 will always pass all resistance checks. Sick crops will have their cropsticks tinted a dark green color, and can be healed with Plant Cure or destroyed by removing the diseased plant. Sick plants can also spread weeds/grass to nearby dirt or empty cropsticks.
Weeds
Crop sticks can be taken over by weeds. If a weed attempts to spawn on an occupied crop stick, the crop rolls a resistance check. A crop with Resistance 31 cannot be overtaken by weeds.
Weed spreading (weeds spreading to adjacent crop sticks) is additionally suppressed by a non-weed crop when its Resistance stat is greater than or equal to its Growth stat. This means that keeping Resistance at or above Growth on your crops actively reduces weed spread into adjacent sticks. Weed-Ex stored in a crop also burns 5 units per attempted spread to block it.
Sick crops automatically fail all weed resistance checks.
Trampling
Crops can be trampled by entities. Whether a crop can be trampled at all depends on two things: the soil type beneath it (some soils are trample-immune) and the crop having a Resistance below 31. A crop with Resistance 31 cannot be trampled.
If a crop is trampleable, two trampling triggers exist:
- Sprinting through crop sticks: triggers a per-tick roll with a base chance of . If this roll succeeds, a resistance check is rolled — the crop is trampled if .
- Falling onto crop sticks from above 0.75 blocks: the chance of trampling is as a flat probability. This check is not affected by Resistance, only fall distance matters.
When trampled, the crop stick breaks and drops its contents (including a seed drop roll). If the soil beneath was farmland, it is converted to dirt.
Seed Recovery
When a crop stick containing a crop is broken (left-click without a tool, or with any non-spade tool), the game rolls a resistance check to determine if the seed is returned:
This means a Resistance of 1 gives a ~3.2% chance, and Resistance 31 guarantees the seed always drops.
When using a Spade, this roll is also granted when harvesting (right-click) the crop as well.
When harvesting or breaking a crop with a Reinforced Spade, the seed drop check is replaced entirely with a different formula:
This gives one guaranteed seed per 10 Resistance, with a fractional chance of one extra. At Resistance 31 this yields 3 seeds with a 10% chance of a fourth.
A crop with Resistance 31 will always pass all resistance checks, cannot be trampled, and cannot be overwritten by weeds.
Tools
Several tools interact specifically with CropsNH crops beyond standard left/right-click.
Spade
The Spade combines the functions of a hoe, trowel, and shovel together, allowing you to clear weeds, till soil, and gain bonus chance for seed drops when harvesting using right-click. See Seed Recovery for details.
Reinforced Spade
The Reinforced Spade replaces the standard seed drop roll with the formula described in the Seed Recovery section, yielding significantly more seeds at higher resistance values. It is the recommended tool for recovering seeds from crops before statting them up, especially for rare or slow-growing crops where seed loss is costly. At resistance 10 or higher, at least one seed drop is guaranteed, two at 20 resistance, and three seeds at 30+ resistance.
Weed-Ex
Weed-Ex can be applied to crop sticks to suppress weed spawning and spreading. Each weed event drains 5 units from the crop's Weed-Ex storage. Weed-Ex does not interact with sickness spread.
World Accelerators
While not primarily a CropsNH tool, World Accelerators (WAs) affect crop sticks while on TileEntity mode, dramatically speeding up all processes done on crops sticks at the cost of power. They are especially useful when trying to brute forcing mutations while breeding, or for growing crops with high growth values like the Primordial Berry.
Machine Processing
Many CropsNH crop products can be processed in GT machines for various resources. Many non-material crops such as Sticky Cane have machine recipes to extract their output or to process their drops, while other have recipes to create various materials and metals. Among these, two particular types of recipes stand out:
4x Ore Processing Recipes (Chemical Reactor)
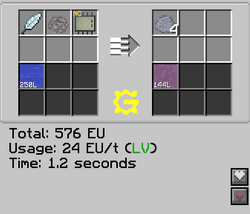
Many crops, mainly ones that have a material equivalent but do not directly produce the material, like Ferrofern and Iron, or Coppon Fiber and Copper, have chemical reactor recipes that take the crop output and crushed ore, and output 4x purified crushed ore or 4x impure dust, depending on circuit usage, as well as a single ingot worth of a related material in molten form. All 4x recipes are unlocked in LV with the exception of the Space Flower, meaning you can dramatically increase your ore processing yields as early as LV.
Ore Synthesis (Forge Hammer)
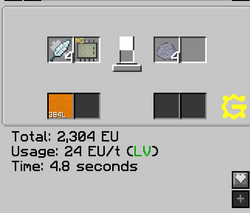
Many material crops also have ore synthesis recipes, which are processed in the forge hammer. Each recipe generally consists 4x of the respective crop and an acid, and outputs 4x of the respective crop's purified ore. This is an extremely effective way of passiving many important early and mid-game resources before machines like the Void Miner are available, as many resources obtained this way are typically either only from ore veins or Bees.
Unlike the 4x ore recipes, these recipes are not generally unlocked at LV. Many of the recipes scale according to the power tier you would typically unlock them (e.g. Bauxia for aluminum unlocks at MV, Scheelite for tungsten unlocks at EV, Stargatium for naquadah unlocks at IV, etc). Many of them are also relatively power and acid hungry, making them a significant drain on power supply if unprepared for the amount that crops generate.
Crop Manager vs. Industrial Farm
A common question is whether the Industrial Farm is worth building at all, when you could simply build more Crop Managers and stack more crop layers across multiple fields. While both machines automate crop harvesting, they are not quite equivalent in practice.
The first major distinction is infrastructure requirements. A Crop Manager harvests crops that are physically growing in the world; it cannot inherently boost the crops planted, and cannot inherently manipulate the crops it maintains; the physical field, water (if not using fertilized dirt with crops that require farmland), crop sticks, and biome requirements are all outside of its control. The Industrial Farm replaces each of these factors, instead simulating growth internally from a single multiblock with water and enriched fertilizer piped in, and can further manipulate factors such as biomes. This also means certain crops, namely those flagged as IF-only (such as Platina and Magical Nightshade), simply cannot be grown with Crop Managers at all.
The second major distinction is the scalability methods. The Crop Manager scales horizontally and physically, with more machines covering more crop sticks, while the Industrial Farm scales vertically, through tier upgrades and a dedicated upgrade system that stacks multiplicative output bonuses impossible to replicate with Crop Managers. A Crop Manager's harvest bonus grows linearly at +5% per tier; the IF gains both a larger seed bed bonus (+20% per tier) and an additional upgrade slot per tier, each compounding on top of the last.
Output Comparison
The following table compares average calculated Oil Berry output per 5 seconds between a single same-tier Crop Manager and a single same-tier Industrial Farm using optimal upgrade configurations, with fully statted (31/31/31) seeds. Two nutrient scenarios are shown for the Crop Manager, since its output depends entirely on the conditions of the physical crop field. The table assumes the Crop Manager is only harvesting one layer of crop, with each crop having fertilizer, water, sky bonus, and zero/one biome tag respectively.
| Tier | CM Output/5s (N=27) | CM Output/5s (N=41) | IF Output/5s | IF advantage (N=27) | IF advantage (N=41) |
|---|---|---|---|---|---|
| MV | 27 | 35 | 70 | ×2.6 | ×2.0 |
| HV | 45 | 59 | 247 | ×5.5 | ×4.2 |
| EV | 69 | 90 | 594 | ×8.6 | ×6.6 |
| IV | 99 | 129 | 1,187 | ×12.0 | ×9.2 |
| LuV | 136 | 177 | 2,210 | ×16.3 | ×12.5 |
| ZPM (no OC) | 180 | 235 | 3,934 | ×16.8 | ×12.9 |
| ZPM (with OC) | 23,496 | x130.5 | x100.1 | ||
| UV (with OC) | 231 | 302 | 31,186 | ×134.9 | ×103.2 |
The IF advantage widens at each tier as its upgrade system stacks multiplicative bonuses. While the Crop Manager's harvest bonus grows linearly at +5% per tier, the IF gains both a larger seed bed bonus and an additional upgrade slot per tier, each compounding on top of the last. The extreme jump at ZPM reflects the Overclocked Growth Acceleration Unit coming online, which has no equivalent for the Crop Manager.
In general, Crop Managers are best thought of as a crop breeding maintainer and early-game harvesting tool, or as a stopgap solution for mass production in cases where you cannot support one or multiple Industrial Farms running. The Industrial Farm becomes viable to take over large-scale production as soon as MV is accessible and the infrastructure to support them exists, and by HV/EV overwhelming outpaces crop managers.
Note that Crop Manager output figures above are theoretical averages. Real-world output varies more than IF output, as it is subject to actual crop growth timing in the world; TileEntity processing lag, chunk loading, and growth tick variance all affect it. IF output is deterministic per cycle.
Notable Crops by Power Tier
The following are crops that are particularly impactful or efficient at each stage of progression. Do note that each tier will only include crops that become relevant at said tier, not unlocked; some crops can be obtained and grown earlier than listed. Certain crops are repeated when said crops has new recipes unlocked at higher tiers, or have notable enough changes to be mentioned. Note that this does not take into consideration other methods of passively generating materials, such as Bees, the Extreme Entity Crusher, or Blood Magic Meteors.
Pre-LV
While CropsNH does not have many crops that can be effectively used and managed before Crop Managers and the Industrial Farm, there are still a few notable and useful ones that are worth considering.
| Crop | Material/Product | Notes |
|---|---|---|
| Sticky Cane/Slime Bonsai/Rubber Bonsai/Slime Plant | Rubber | Provides large amounts of rubber-related materials, making obtaining cables en mass early on much easier. Each crop is equally viable, though sticky cane is the easiest to manage. |
| Cotton/Flax | Cotton/String | Provides large amounts of cotton and string, both needed for various crafts pre-LV. Recommended to be set up in the Stone Age. |
| Clay Lily | Clay | Directly produces clay. Extremely useful for making BBFs, or anything requiring bricks. |
| Corium | Leather | Useful for supplying leather for the many stacks you will need early-game. |
| Papyrus | Paper | Directly provides paper. Who needs paperbark, anyway? |
| Vanilla Bonsai Trees | Wood, various | Provides large amounts of wood, eliminating the need to chop trees. |
| Fertilia | Fertilizer, various | Produces Fertilizer, as well as Calcite, Apatite, and Phosphate dust. Borderline necessary for the fact that it produces fertilizer for you, as well as other useful dusts early-game. |
| Oreberries | Various | Provides dusts with maceration for metallic oreberries. Useful for getting certain metals before you are able to process the proper crop versions, notably iron, gold, tin, and copper. Aluminum oreberries are extremely useful for producing early aluminum. |
The following crops are not directly related to any tier or progression, but are notable mentions for their usefulness in other regards, mainly as replacements of vanilla methods:
| Crop | Material/Product | Notes |
|---|---|---|
| Dye Flowers | Dyes | Useful if respective dyes are needed. Relevant flowers are: Dayflower, Allium, Azure Bluet, White Tulip, Pink Tulip, Oxeye Daisy, Blue Orchid, Poppy, Dandelion, Purple Tulip, Orange Tulip, Red Tulip. |
| Pam's Harvestcraft Crops | Food(s) | CropsNH versions of Pam's Harvestcraft crops. Too many to list here; reference questbook and Crops List. Useful for getting those tasty hearts and obtaining the Healing Axe via quest. It's not particularly necessary to use the CropsNH versions, as the regular versions are often more than enough. |
| Mob Food Crops | Food(s) | Includes Meatrose, Egg Plant, and Goldfish. Useful if you don't feel like herding around animals. |
LV
With the unlock of the Crop Manager, as well as many new machines, a massive amount of crops open up this tier. Note that using crops to directly synthesize ores at this tier is not recommended, as creating and managing the amount of acid you will need is difficult before having access to multiblocks like the Large Chemical Reactor, though doing so anyways can be massively profitable, albeit difficult. Some crops are outright not able to be used for synthesis in this tier, due to either higher tier acid requirements, or being MV+ locked.
| Crop | Material/Product | Notes |
|---|---|---|
| Ferrofern | Iron | Can be used to 4x Iron, Magnetite, Brown Limonite, Yellow Limonite, Vanadium Magnetite, Banded Iron, Pyrite, Meteoric Iron, Basaltic Mineral Sand, and Granitic Mineral Sand ores. Synthesis uses Sulfuric Acid. Can also be directly extracted for dust, albeit at a very poor ratio. |
| Tine | Tin | Can be used to 4x Tin, Cassiterite, and Cassiterite Sand ores. Synthesis uses Sulfuric Acid. Can also be directly extracted for dust, albeit at a very poor ratio. |
| Coppon | Copper | Can be used to 4x Copper, Tetrahedrite, Chalcopyrite, Malachite, Pyrite, and Stibnite ores. Synthesis uses Sulfuric Acid. Can also be directly extracted for dust, albeit at a very poor ratio. |
| Plumbilia | Lead | Can be used to 4x Lead and Galena ores. Synthesis uses Sulfuric Acid. Can also be directly extracted for dust, albeit at a very poor ratio. |
| Nickelback | Nickel | Can be used to 4x Nickel, Garnierite, Pentlandite, Cobaltite, Wulfenite, and Powellite ores. Nickel ore 4x recipe gives molten cobalt as a byproduct, allowing you to obtain cobalt easily pre-Twilight Forest through small ores. Synthesis uses Sulfuric Acid. |
| Galvania | Zinc | Can be used to 4x Zinc, Sulfur, and Sphalerite ores. Synthesis uses Sulfuric Acid. |
| Pyrolusium | Manganese | Can be used to 4x Manganese, Grossular, Spessartine, Pyrolusite, and Tantalite ores. Tantalite recipe produces molten manganese. Manganese recipe produces molten chrome. Synthesis uses Sulfuric Acid. |
| Argentia | Silver | Can be used to 4x Silver and Galena ores. Synthesis uses Sulfuric Acid. Can also be directly extracted for dust, albeit at a very poor ratio. |
| Auronia | Gold | Can be used to 4x Gold and Magnetite ores. Synthesis uses Hydrochloric Acid. |
| Thiosulfine | Sulfur | Can be used to 4x Sulfur ores. Synthesis uses Sulfuric Acid. Can also be directly extracted for dust, albeit at a very poor ratio. Not particularly recommended to grow in LV, as you have more sulfur than you could possibly ever need from various other sources, particularly Oil Processing. |
| Bobs-Yer-Uncle-Ranks | Emeralds | Can be used to 4x Emerald and Beryllium ores. Synthesis uses Hydrochloric Acid. |
| Micadia | Mica | Can be used to 4x Mica ore. Does not have a synthesis recipe. Can be extracted to yield dust in MV. |
| Evil Ore | Quartz | Directly produces Nether Quartz Dust, Certus Quartz Dust, and Nether Quarts. Useful for the many components that use both types of quartz. |
| Salty Root | Salt Products | Produces a very high volume of Salty Root. Can be used to 4x Salt, Rock Salt, Saltpeter, Spodumene, Lepidolite, Barite, and Borax ores. Can be chemical bathed with water for Salt, Rock Salt, and Saltpeter. Extremely good source of Chlorine, as this crop produced an abnormally high amount of drops. |
| Tearstalks | Ghast Tears | Produces Ghast Tears, which can be chemical reacted for Potassium and Lithium, as well as salt water. Inferior chlorine source to Salty Root. |
| Diareed | Diamonds | Can be used to 4x Diamond, Graphite, Coal and Lignite Coal ores. Synthesis uses Hydrochloric acid. No longer gives diamonds or diamond dust directly! Extremely useful for the amount of diamond plates you will be needing, alongside the many upgrades that use diamonds. |
| Lazulia | Lapis Lazuli | Directly produces lapis and lapis dust. Useful for tinkers tools, but not much more until MV. |
| Ardite Oreberry | Ardite Nugget | Only way to directly produce Ardite using crops, as there is no non-oreberry Ardite crop. Low yield and high growth requirements make this a bit of a pain. You should probably use miners in the nether instead. |
| Soul Sand Lily | Soul Sand | Directly produces soul sand. Can be centrifuged to make Oil renewably, before you can easily process oil berries. |
| Sand Lily | Sand | Directly produces sand. Can be electrolyzed for easy silicon dioxide, though a bit power intensive. |
MV
With the unlock of the Industrial Farm, as well as the MV Electrolyzer, many crops can now be mass-produced or yield many more resources than in LV. Crop synthesis becomes much more viable, as many new fluid storage and automation options become available.
| Crop | Material/Product | Notes |
|---|---|---|
| Bauxia | Aluminium | Can be use to 4x Aluminum and Bauxite ore. Crop synthesis requires Hydrochloric Acid for aluminum ore. Bauxite ore synthesis is EV locked. |
| Oil Berry | Oil | Provides Oil Berries, which can be fluid extracted for regular Oil. Can easily supply oil-powered bases for many power tiers, being viable up to unlocking fusion power in LUV/ZPM. Has a direct distillation tower recipe to emulate each type of oil, but it is far inferior to fluid extracting it, unless you are aiming for a specific type of oil. Can also convert Raw Oil to Heavy Oil and vice versa, as well as Light Oil and Regular Oil and vice versa.
Requires the Crop Breeder to be bred. Note that 31/31/31 seeds cannot be directly made in MV with the crop breeder, as it does not have enough fluid capacity for enriched fertilizer. You will have to propagate the seeds out manually to achieve 31/31/31. |
| Sugar Beet | Sugar/Oxygen | Provides Sugar Beets, which can be extracted into sugar, and then electrolyzed into a large amount of oxygen. Fantastic for all your oxygen needs, especially for the ever-so-hungry EBF. |
| Pyrolusium | Tantalum | With MV power hatches unlocks the EBF 4x recipe for tantalite, which produces an extra ingot of hot tantalum. |
| Vanilla Bonsais | Wood | With Benzene being unlocked this tier, Bonsai crops can easily supply the wood you need for mass production. |
| Hemp | Hemp | While being an upgrade for string production over Flax, Hemp is also required to build the Industrial Farm. |
| Stones | Various | Includes the stone dusts, namely Stone, Tuff, Deepslate, Netherrack, Red Granite, Black Granite and Marble Lilies in this tier. These crops produce stone dusts, which have various process chains mostly involving centrifuging and electrolysis, and can produce a wide variety of material, albeit very slowly and at a high power cost. Some resulting dusts cannot be processed until later power tiers, check them in NEI.
Of these, Black Granite is especially notable here as the crop source of Fluorine, which you will need a lot of in HV and beyond. |
| Rubyne | Ruby/Chrome | Directly provide Ruby and Ruby Dust. Can be processed for a large amount of chrome, which is necessary for the massive amount of Stainless Steel you will need for HV. |
| Gardyndia | Garnets/Various | Produces various versions of both red and yellow garnets, which can be processed and ground down and electrolyzed for an array of materials. |
| Micadia | Mica | Extraction recipe for direct dust unlocks in this tier. Never will you need to search for the ever-annoying Mica veins again for your EBF coils. |
HV
HV marks the tier you unlock the Large Chemical Reactor, making crop synthesis a breeze. Crops that directly require the Industrial Farm become available this tier.
| Crop | Material/Product | Notes |
|---|---|---|
| Thiosulfine + Galvania | Sphalerite/Gallium byproducts | While not directly a crop, combining Thiosulfine and Galvania in an alloy smelter lets you create Sulfur-Doped Galvania Residue, which can be synthesized into Sphalerite ore directly, with a byproduct of Gallium. Useful for your ever growing Gallium needs. |
| Oil Berry | Oil | With the unlock of the Distillation Tower, Oil Berries become far more powerful. What's a Fluid Drilling Rig, again? |
| Primordial Berry | Primordial Pearls | While technically unlocked with Infusion in HV, attempting to grow this crop is an exercise in patience in this tier, far more than any other crop. With a staggeringly high growth requirement of 375,000, this crop takes actual real life days to grow, and given that it is a Tier 16 crop, it also requires to be fully fertilized and watered in order to not grow sick. On top of this, this crop cannot be made or replicated in the Crop Breeder or Crop Replicator, and cannot self-propagate, forcing you to roll a 10% chance for each attempt with the Reinforced Spade if you want the seed to use for breeding or for using it in an Industrial Farm.
If you do decide to grow this, many, many World Accelerators set to Tile Entity mode are recommended, as to not accidentally get a Stargate before these things grow. |
| Magical Nightshade | Salis Mundis, Thaumium, Void Metal | Produces Magical Essence, which can be used for a large variety of magic-related resources, and letting you skip many magic-related craft and directly make them. In HV, these are Salis Mundis, Thaumium, and Void Metal. These also have a rather long growth time, and do not produce much. Industrial Farm is required for this crop to grow with a minimum HV tier seed bed.
This crop also requires the Primordial Berry seed in order to be made via Crop Breeder, however you can directly place Magic Essence onto a crop to plant it with base stats. |
| Platina | Platinum | Can be used to 4x Platinum, Sheldonite, Palladium, Neodymium, and Bastanite ore. Can also be used as a replacement input for the Platline. Requires the Industrial Farm to grow with a minimum HV tier seed bed. |
| God of Thunder | Thorium | Can be used to 4x Thorium and Thorianite ores. Thorium 4x gives Molten Uranium, allowing you to obtain Uranium two tiers early, though you wont have much use for it in HV. Crop synthesis is locked to EV, requiring Formic Acid. Requires the Industrial Farm to grow with a minimum HV tier seed bed. |
EV
With the unlock of Applied Energistics, mass-production becomes even easier, and centralized power helps you power the immense power drain of the Industrial Farm. Many nuclear-powered setups become viable early as well.
| Crop | Material/Product | Notes |
|---|---|---|
| Bauxia | Rutile/Titanium | Now that Bauxite is available, you can use Bauxia to 4x that ore, as well as the ability to synthesize the ore with hydrofluoric acid. |
| Evil Ore | Quartz | With AE2 requiring a significant amount of different quartz crystals, Evil Ore crops become much more relevant this tier to supply your ever-growing network. Hope you have a few autoclaves ready to go. |
| Trollplant | Plutonium 241 | Provides Plutonium 241, as well as scrap and Spinel. Useful if you don't want to produce Plutonium 241 via nuclear fission and just want it directly. |
| Reactoria | Uranium | Produces both Reactoria Leafs and Reactoria Stems. Reactoria Leafs can 4x Pitchblende ore, and can synthesize Pitchblende ore with Nitric Acid. Reactoria Stems can 4x Pitchblende, Uranium 235, Uranium 238, and Uraninite ore, and can synthesize Uranium 238 ore with Phthalic Acid. Useful for getting high amounts of Uranium in EV for nuclear power setups like Vac Nukes and breeding out further nuclear materials with the various nuclear-based multiblocks available in EV/IV. Requires the Industrial Farm to grow with a minimum EV tier seedbed.
|
| Transformium | UU-Matter, UU-Amplifier | Produces UUA and UUM berries, which can be fluid extracted into small amounts of UU-Amplifier and UU-Matter respectively. Extremely useful for the Crop Synthesizer and Replicator. Requires the Industrial Farm to grow with a minimum EV tier seedbed. |
| Titania | Titanium | Can be used to 4x Titanium, Ilmenite, Bauxite, and Rutile ore. Can directly synthesize titanium ore with Phthalic Acid. Useful for the immense amount of titanium you will be needing in EV/IV for AE2 and machines. Requires the Industrial Farm to grow with a minimum EV tier seedbed. |
| Scheelinium | Tungsten | Can be used to 4x Scheelite, Tungsten, Lithium, and Tungstate ore. Directly produces Scheelite ore with Nitric Acid via synthesis. Useful for the immense amount of tungsten you will be needing in EV/IV. Allows you to functionally skip T2 rocket. Requires the Industrial Farm to grow with a minimum EV tier seedbed. |
IV+
With the immense resource and infrastructure need in IV and beyond, crops can dramatically improve your quality of life for getting mass amounts of materials. This is also the last tier that new crops become available; all crops can be made with IV-tier Industrial Farms.
| Crop | Material/Product | Notes |
|---|---|---|
| Salty Root | Borax/Boron | With the multiblock chemical bath being unlocked, Borax is now obtainable from processing Salty Root. Good for the amount of borosilicate glass you will be needing. |
| Plumbilia, Thiosulfine, Galvania | Indium | With the ability to make both Galena and Sphalerite ores using the alloy smelter and processing the resulting compound, you can passively feed an Indium production line. Extremely useful for the large amount you will be needing starting in IV. |
| Glowing Coral | Sunnarium | Produces Glowing Coral, which can be autoclaved with some UU-Matter in a cleanroom to produce Sunnarium. Useful if you don't want to make it via nuclear processes. |
| Magical Nightshade | Shadow Metal, Mytryl, Ichorium | IV unlocks three new recipes using magic essence, with Shadow Metal and Mytryl being producible with an IV-tier LCR, and Ichorium Ingots being directly producible at the cost of significant Blood Magic progression after you unlock IV energy hatches, skipping the extremely long and tedious infusion crafting. |
| Star Wart | Nether Stars | Produces Star Wart, which can be processed into Nether Stars. Immensely useful for the large amount you will be needing for IV+ components, among other needs like Ichor and Naqfuel. Requires the Industrial Farm to grow with a minimum IV tier seedbed. |
| Blazereed | Blaze Rods/Blaze Powder | Directly produces blaze drops. Useful for providing the large amount of Pyrotheum (and Cryotheum) for your Volcani and Cryogenic Freezers. |
| Iridine | Iridium | Can 4x Iridium ore. Produces Platinum Concentrate when doing so. Can directly make Acidic Iridium Solution for use in the Platline using Phthalic Acid. Useful for supplementing your Platline for extra Iridium. Requires the Industrial Farm to grow with a minimum IV tier seedbed. |
| Osmianth | Osmium | Can 4x Osmium ore, or optionally turn it into 8x Rarest Metal Residue Dust. Produces Acidic Iridium Solution while doing so. Can directly produce Acidic Osmium Solution with Phthalic Acid. Useful for supplementing your Platline for extra osmium. Requires the Industrial Farm to grow with a minimum IV tier seedbed. |
| Stargatium | Naquadah | Can 4x Naquadah, Naquadria, and Enriched Naquadah ore. Produced variants of Naquadah Goo while doing so. Can directly produce Naquadah ore with Phthalic acid. Requires the Industrial Farm to grow with a minimum IV tier seedbed. |
| Space Flower | Various | Has a large variety of recipes, mostly ranging from IV to ZPM ores. Can 4x Meteoric Iron, Desh, Oriharukon, Ledox, Callisto Ice, Black Plutonium, and Deep Iron. It can also be used to create Meteoric Iron, Meteoric Steel, Oriharukon, Callisto Ice, Ledox, Mytryl, Deep Iron, Black Plutonium, and Mysterious Crystal, all alongside various other materials. Some of the recipes enable some skips, such as being able to make superconducting coils early with Deep Iron directly giving molten trinium. Replaces using Transformium for UU-Matter, since it produces more by being fluid-extracted due to the UUM berry only having a 10% drop chance. Requires the Industrial Farm to grow with a minimum IV tier seedbed. |
Crops List
The following is the complete list of crops organized by growth points (ticks) and tier. Notice that many require a particular light level and/or the Industrial Farm (IF) to grow, and their outputs are not always guaranteed. The drop multiplier is typically but there are a few exceptions highlighted BLUE. For example, Mandrake root is instead , Magical Nightshade is , and the rest are hardcoded values such as x1.50 for glowheat and x4.00 for salty root.
| Tier | Crop | Soil Type | Min Seed Bed | Growth Points | Preferences | Requirements | Drops | Outputs (%) |
|---|---|---|---|---|---|---|---|---|
| 1 | Brown Mushroom | Stone+Dirt | None | 400 | Wet, Swamp, Mushroom | Needs a light level of 9 or lower | x0.95 | 1 Mushroom (100.0%) |
| 1 | Red Mushroom | Stone+Dirt | None | 400 | Wet, Swamp, Mushroom | Needs a light level of 9 or lower | x0.95 | 1 Mushroom (100.0%) |
| 1 | Eyebulb | Netherrack | None | 450 | Nether, Spooky | x0.95 | 1 Eyebulb (100.0%) | |
| 1 | Andesite Lily | Stone | None | 600 | Hills, Mountain | Needs a block of andesite below | x0.95 | 1 Andesite (100.0%) |
| 1 | Basalt Lily | Stone | None | 600 | Hills, Mountain | Needs a block of basalt below | x0.95 | 9 Basalt Dust (100.0%) |
| 1 | Black Granite Lily | Stone | None | 600 | Hills, Mountain | Needs a block of black granite below | x0.95 | 9 Black Granite Dust (100.0%) |
| 1 | Deepslate Lily | Stone | None | 600 | Hills, Mountain | Needs a block of deepslate below | x0.95 | 9 Deepslate Dust (100.0%) |
| 1 | Diorite Lily | Stone | None | 600 | Hills, Mountain | Needs a block of diorite below | x0.95 | 1 Diorite (100.0%) |
| 1 | Granite Lily | Stone | None | 600 | Hills, Mountain | Needs a block of granite below | x0.95 | 1 Granite (100.0%) |
| 1 | Marble Lily | Stone | None | 600 | Hills, Mountain | Needs a block of marble below | x0.95 | 9 Marble Dust (100.0%) |
| 1 | Nether Stone Lily | Stone | None | 600 | Hot, Nether, Dry | Needs a block of netherrack below | x0.95 | 9 Netherrack Dust (100.0%) |
| 1 | Red Granite Lily | Stone | None | 600 | Hills, Mountain | Needs a block of red granite below | x0.95 | 9 Red Granite Dust (100.0%) |
| 1 | Sand Lily | Stone | None | 600 | Hot, Sandy, Dry | Needs a block of sand or sandstone below | x0.95 | 4 Sand (100.0%) |
| 1 | Stone Lily | Stone | None | 600 | Hills, Mountain | Needs a block of stone below | x0.95 | 9 Stone Dust (100.0%) |
| 1 | Tuff Lily | Stone | None | 600 | Hills, Mountain | Needs a block of tuff below | x0.95 | 9 Tuff Dust (100.0%) |
| 1 | Potato | Farmland | None | 800 | Coniferous, Cold, Plains | Needs a light level of 9 or higher | x0.95 | 1 Potato (100.0%) |
| 1 | Clay Lily | Stone | None | 850 | River, Wet, Swamp | Needs a block of clay or hardened clay below | x0.95 | 1 Clay (100.0%) |
| 1 | End Stone Lily | Stone | None | 850 | End, Cold, Dry | Needs a block of endstone below | x0.95 | 2 Endstone Dust (100.0%) |
| 1 | Wheat | Farmland | None | 1,000 | Lush, Plains | Needs a light level of 9 or higher | x0.95 | 1 Wheat (100.0%) |
| 1 | Acacia Bonsai | Dirt | None | 1,600 | Hot, Sparse, Savanna, Plains | x0.95 | 1 Acacia Sapling (30.0%), 10 Acacia Log (60.0%) | |
| 1 | Birch Bonsai | Dirt | None | 1,600 | Hills, Forest | x0.95 | 1 Birch Sapling (30.0%), 10 Birch Log (60.0%) | |
| 1 | Dark Oak Bonsai | Dirt | None | 1,600 | Dense, Forest, Spooky | x0.95 | 2 Apple (5.0%), 1 Dark Oak Sapling (30.0%), 10 Dark Oak Log (60.0%) | |
| 1 | Jungle Bonsai | Dirt | None | 1,600 | Hot, Wet, Dense, Jungle | x0.95 | 1 Jungle Sapling (30.0%), 10 Jungle Log (60.0%) | |
| 1 | Oak Bonsai | Dirt | None | 1,600 | Hills, Forest, Plains | x0.95 | 2 Apple (5.0%), 1 Oak Sapling (30.0%), 10 Oak Log (60.0%) | |
| 1 | Rubber Bonsai | Dirt | None | 1,600 | Coniferous, Forest | x0.95 | 2 Sticky Resin (5.0%), 1 Rubber Tree Sapling (30.0%), 10 Rubber Wood (60.0%) | |
| 1 | Slimy Bonsai | Dirt+Slimy | None | 1,600 | Wet, Swamp | x0.95 | 1 Slimy Sapling (30.0%), 4 Congealed Green Slime (60.0%) | |
| 1 | Spruce Bonsai | Dirt | None | 1,600 | Mountain, Coniferous, Forest | x0.95 | 1 Spruce Sapling (30.0%), 10 Spruce Log (60.0%) | |
| 2 | Torchberry | Farmland | None | 150 | Hills, Forest | Needs a light level of 10 or lower | x0.90 | 1 Torchberries (100.0%) |
| 2 | Blackberry | Farmland | None | 200 | Wet, Dense, Lush | Needs a light level of 9 or higher | x0.90 | 3 Blackberry (100.0%) |
| 2 | Blueberry | Farmland | None | 200 | Hills, Lush, Forest | Needs a light level of 9 or higher | x0.90 | 3 Blueberry (100.0%) |
| 2 | Berry | Farmland | None | 200 | Dense, Forest | Needs a light level of 9 or higher | x0.90 | 3 Berry (100.0%) |
| 2 | Huckleberry | Farmland | None | 200 | Hills, Mountain, Cold, Plains | Needs a light level of 9 or higher | x0.90 | 1 Huckleberry (100.0%) |
| 2 | Maloberry | Farmland | None | 200 | Wet, Cold, Lush | Needs a light level of 9 or higher | x0.90 | 3 Maloberry (100.0%) |
| 2 | Raspberry | Farmland | None | 200 | Plains, Dry | Needs a light level of 9 or higher | x0.90 | 3 Raspberry (100.0%) |
| 2 | Strawberry | Farmland | None | 200 | Lush, Plains | Needs a light level of 9 or higher | x0.90 | 1 Strawberry (100.0%) |
| 2 | Bamboo Shoot | Dirt | None | 250 | Dense, Lush, Jungle, Forest | x0.90 | 2 Bamboo (100.0%) | |
| 2 | Olivia | Stone | None | 400 | Hills, Dry | Needs a block of olivine below | x0.90 | 1 Olivine (25.0%), 1 Olivine Dust (75.0%) |
| 2 | Sugar Cane | Sand+Dirt | None | 400 | Hot, Wet | x0.90 | 2 Sugar Canes (100.0%) | |
| 2 | Ivy | Farmland | None | 450 | Dense, Nether, Jungle, Magical | x0.90 | 2 Ivy (100.0%) | |
| 2 | Turnip | Farmland | None | 450 | Wet, Cold, Plains | Needs a light level of 9 or higher | x0.90 | 1 Turnip (100.0%) |
| 2 | Vine | Farmland | None | 450 | Wet, Lush, Jungle | x0.90 | 2 Vines (100.0%) | |
| 2 | Water Lily | Farmland | None | 450 | River, Wet, Swamp | x0.90 | 2 Pink Dye (200.0%), 2 Lily Pad (800.0%) | |
| 2 | Wild Carrot | Farmland | None | 450 | Hot, Sandy, Plains | Needs a light level of 9 or higher | x0.90 | 1 Wild Carrots (100.0%) |
| 2 | Allium | Dirt | None | 600 | Sandy, Sparse, Dry | x0.90 | 1 Allium (25.0%), 1 Magenta Dye (75.0%) | |
| 2 | Azure Bluet | Dirt | None | 600 | Hills, Lush, Forest | x0.90 | 1 Azure Bluet (25.0%), 1 Light Gray Dye (75.0%) | |
| 2 | Blue Orchid | Dirt | None | 600 | Wet, Lush, Swamp | x0.90 | 1 Blue Orchid (25.0%), 1 Light Blue Dye (75.0%) | |
| 2 | Dandelion | Dirt | None | 600 | Lush, Forest, Plains | x0.90 | 1 Dandelion (25.0%), 1 Dandelion Yellow (75.0%) | |
| 2 | Dayflower | Dirt | None | 600 | Sparse, Hills, Cold | x0.90 | 1 Cyan Dye (100.0%) | |
| 2 | Orange Tulip | Dirt | None | 600 | Wet, Lush, Plains | x0.90 | 1 Orange Tulip (25.0%), 1 Orange Dye (75.0%) | |
| 2 | Oxeye Daisy | Dirt | None | 600 | Lush, Forest, Plains | x0.90 | 1 Oxeye Daisy (25.0%), 1 Light Gray Dye (75.0%) | |
| 2 | Pink Tulip | Dirt | None | 600 | Wet, Lush, Plains | x0.90 | 1 Pink Tulip (25.0%), 1 Pink Dye (75.0%) | |
| 2 | Poppy | Dirt | None | 600 | Hills, Lush, Plains | x0.90 | 1 Poppy (25.0%), 1 Rose Red (75.0%) | |
| 2 | Purple Tulip | Dirt | None | 600 | Wet, Plains | x0.90 | 1 Purple Dye (100.0%) | |
| 2 | Red Tulip | Dirt | None | 600 | Hot, Lush, Plains | x0.90 | 1 Red Tulip (25.0%), 1 Rose Red (75.0%) | |
| 2 | White Tulip | Dirt | None | 600 | Lush, Cold, Plains | x0.90 | 1 White Tulip (25.0%), 1 Light Gray Dye (75.0%) | |
| 2 | Barley | Farmland | None | 675 | Plains, Dry | Needs a light level of 9 or higher | x0.90 | 1 Barley (100.0%) |
| 2 | Carrot | Farmland | None | 800 | Hot, Sandy, Plains | Needs a light level of 9 or higher | x0.90 | 1 Carrot (100.0%) |
| 2 | Pumpkin | Farmland | None | 1,000 | Wet, Plains | Needs a light level of 9 or higher | x0.90 | 1 Pumpkin (100.0%) |
| 2 | Flax | Farmland | None | 1,200 | Beach, River, Sandy, Wet | x0.90 | 1 String (100.0%) | |
| 2 | Indigo | Dirt | None | 1,200 | Wet, Lush | x0.90 | 1 Indigo Blossom (100.0%) | |
| 2 | Melon | Farmland | None | 1,200 | Wet, Lush | Needs a light level of 9 or higher | x0.90 | 1 Melon (33.33%), 4 Melon Slice (66.66%) |
| 2 | Soul Sand Lily | Stone | None | 2,000 | Sandy, Nether, Spooky | Needs a block of soulsand below | x0.90 | 1 Soul Sand (25.0%) |
| 3 | Cactus | Sand | None | 450 | Hot, Sandy, Dry | x0.86 | 1 Cactus (100.0%) | |
| 3 | Garlic | Farmland | None | 450 | Plains, Dry | Needs a light level of 9 or higher | x0.86 | 1 Garlic (100.0%) |
| 3 | Thornvine | Netherrack | None | 450 | Nether, Dry | x0.86 | 2 Thornvines (100.0%) | |
| 3 | Blue Glowshroom | Stone+Dirt | None | 600 | Nether, Mushroom, Magical | x0.86 | 1 Blue Glowshroom (100.0%) | |
| 3 | Glowshroom | Stone+Dirt | None | 600 | Nether, Mushroom, Magical | x0.86 | 1 Glowshroom (100.0%) | |
| 3 | Green Glowshroom | Stone+Dirt | None | 600 | Nether, Mushroom, Magical | x0.86 | 1 Green Glowshroom (100.0%) | |
| 3 | Purple Glowshroom | Stone+Dirt | None | 600 | Nether, Mushroom, Magical | x0.86 | 1 Purple Glowshroom (100.0%) | |
| 3 | Flowering Vine | Farmland | None | 675 | Dense, Jungle | x0.86 | 2 Flowering Vines (100.0%) | |
| 3 | Cotton | Farmland | None | 900 | Hot, Dry | Needs a light level of 9 or higher | x0.86 | 1 Cotton (100.0%) |
| 3 | Cocoa | Farmland | None | 1,700 | Wet, Dense, Lush, Jungle | Needs a light level of 9 or higher | x0.86 | 1 Cocoa Beans (100.0%) |
| 3 | Fertilia | Farmland | None | 1,800 | Hot, Wet, Swamp | x0.86 | 1 Phosphate Dust (12.50%), 1 Apatite Dust (12.50%), 1 Fertilizer (12.50%), 1 Calcite Dust (62.50%) | |
| 3 | Necrobloom | Farmland | None | 1,800 | Dead, Wasteland | x0.86 | 1 Purple Dye (5.0%), 1 Poison Powder (95.0%) | |
| 3 | Zomplant | Graveyard | None | 1,800 | Dead, Wasteland | x0.86 | 1 Zombie Head (0.50%), 1 Zombie Brain (1.50%), 1 Rotten Flesh (98.0%) | |
| 3 | Glowflower | Dirt | None | 2,000 | Wet, Lush, Forest, Magical | x0.86 | 2 Glowflower (100.0%) | |
| 4 | Sticky Cane | Sand+Dirt | None | 200 | Hot, Sandy, Wet | x0.81 | 1 Sticky Resin (100.0%) | |
| 4 | Blightberry | Netherrack | None | 300 | Nether, Dry | x0.81 | 2 Blightberry (100.0%) | |
| 4 | Duskberry | Netherrack | None | 300 | Hot, Nether | x0.81 | 2 Duskberry (100.0%) | |
| 4 | Skyberry | Netherrack | None | 300 | Nether, Dry | x0.81 | 2 Skyberry (100.0%) | |
| 4 | Stingberry | Netherrack | None | 300 | Hot, Nether | x0.81 | 2 Stingberry (100.0%) | |
| 4 | Moss | Farmland | None | 450 | Wet, Swamp, Lush | x0.81 | 1 Moss Patch (5.0%), 1 Moss (30.0%), 1 Tree Moss (65.0%) | |
| 4 | Saguaro Cactus | Sand | None | 450 | Hot, Sandy, Dry | Needs a light level of 9 or higher | x0.81 | 2 Saguaro Cactus (50.0%), 3 Saguaro Fruit (50.0%) |
| 4 | Sugar Beet | Farmland | None | 450 | Wet, Cold, Forest | x0.81 | 1 Sugar Beet (100.0%) | |
| 4 | Goldfish | Farmland | None | 600 | River, Wet, Spooky | x0.81 | 1 Goldfish (60.0%) | |
| 4 | Inkbloom | Dirt | None | 600 | Wet, Ocean | x0.81 | 1 Ink Sac (100.0%) | |
| 4 | Chilly | Farmland | None | 800 | Hot, Lush | Needs a light level of 9 or higher | x0.81 | 1 Chili Pepper (100.0%) |
| 4 | Cucumber | Farmland | None | 800 | Hot, Lush | Needs a light level of 9 or higher | x0.81 | 1 Cucumber (100.0%) |
| 4 | Grape | Farmland | None | 800 | Hot, Sparse, Dry | Needs a light level of 9 or higher | x0.81 | 1 Grape (100.0%) |
| 4 | Lemon | Dirt | None | 800 | Hot, Plains, Dry | x0.81 | 1 Lemon (100.0%) | |
| 4 | Onion | Farmland | None | 800 | Sandy, Sparse, Dry | Needs a light level of 9 or higher | x0.81 | 1 Onion (100.0%) |
| 4 | Sapphirum | Stone | None | 800 | Wet, Ocean, Cold | Needs a block of sapphire below | x0.81 | 1 Sapphire (25.0%), 1 Sapphire Dust (75.0%) |
| 4 | Tomato | Farmland | None | 800 | Hot, Wet | Needs a light level of 9 or higher | x0.81 | 1 Max Tomato (25.0%), 1 Tomato (75.0%) |
| 4 | Canola | Farmland | None | 900 | Sparse, Cold, Plains | x0.81 | 1 Canola Flower (100.0%) | |
| 4 | Belladonna | Farmland | None | 1,100 | Wet, Spooky | x0.81 | 1 Belladonna Flower (100.0%) | |
| 4 | Glint Weed | Farmland | None | 1,100 | Sandy, Plains, Magical | x0.81 | 1 Glint Weed (100.0%) | |
| 4 | Mandrake | Farmland | None | 1,100 | Spooky, Magical | x0.41 | 1 Mandrake Root (100.0%) | |
| 4 | Snowbell | Farmland | None | 1,100 | Snowy, Cold | x0.81 | 1 Cryolite Dust (2.50%), 1 Snowball (10.0%), 1 Icy Needle (89.0%) | |
| 4 | Water Artichoke | Farmland | None | 1,100 | River, Wet, Ocean | Needs a light level of 9 or higher | x0.81 | 1 Water Artichoke Globe (100.0%) |
| 4 | Wolfsbane | Farmland | None | 1,100 | Forest, Spooky, Magical | x0.81 | 1 Wolfsbane (100.0%) | |
| 4 | Glowheat | Netherrack | None | 1,500 | Hot, Nether, Plains | Needs a block of glowstone below | x1.50 | 1 Glowstone Dust (100.0%) |
| 4 | Salty Root | Farmland | None | 1,600 | Sandy, Dead, Dry | x4.00 | 1 Salty Root (100.0%) | |
| 4 | Spidernip | Farmland | None | 2,400 | Wet, Lush | x0.81 | 1 Cobweb (16.67%), 1 Spider Eye (16.67%), 1 String (66.66%) | |
| 4 | Tea | Farmland | None | 2,400 | Hot, Wet, Hills | x0.81 | 1 Tea Leaf (100.0%) | |
| 4 | Tin Oreberry | Stone | None | 6,000 | Hills, Mountain | Needs a block of tin below, and a light level of 10 or lower | x0.81 | 6 Tin Oreberry (100.0%) |
| 5 | Glowing Coral | Farmland | None | 450 | River, Ocean | Needs a block of glowstone below | x0.77 | 2 Glowing Coral (100.0%) |
| 5 | Papyrus | Farmland | None | 450 | Wet, Swamp, Jungle | x0.77 | 1 Paper (100.0%) | |
| 5 | Corpseplant | Graveyard | None | 800 | Dead, Spooky | x0.77 | 1 Bone (12.50%), 1 Rotten Flesh (25.0%), 1 Bone Meal (62.50%) | |
| 5 | Hemp | Farmland | None | 800 | Sandy, Dry | x0.77 | 1 Hemp Stem (100.0%) | |
| 5 | Gaia Wart | Soulsand | None | 1,000 | Snowy, Cold | Needs a block of snow below | x0.80 | 1 Gaia Wart (100.0%) |
| 5 | Nickelback | Stone | None | 1,000 | Lush, Plains | Needs a block of nickel below | x0.77 | 1 Nickelback (100.0%) |
| 5 | Tine | Stone | None | 1,000 | Hills, Mountain | Needs a block of tin below | x0.77 | 1 Tine Twig (100.0%) |
| 5 | Mana Bean | Thaum Logs | None | 2,000 | Forest, Magical | Needs a mixed crystal cluster below | x0.77 | 1 Mana Bean Terra (16.66%), 1 Mana Bean Aer (16.66%), 1 Mana Bean Ignis (16.66%), 1 Mana Bean Aqua (16.66%), 1 Mana Bean Ordo (16.66%), 1 Mana Bean Perditio (16.66%) |
| 5 | Nether Wart | Soulsand | None | 2,000 | Hot, Nether | x2.00 | 1 Nether Wart (100.0%) | |
| 5 | Hops | Farmland | None | 2,400 | Lush, Plains | Needs a light level of 9 or higher | x0.77 | 1 Hops (100.0%) |
| 5 | Cinderpearl | Dirt | None | 4,000 | Hot, Dry, Magical | Needs a block of blaze below | x0.77 | 1 Cinderpearl (100.0%) |
| 5 | Shimmerleaf | Dirt | None | 4,000 | Lush, Magical | Needs a block of quicksilver below | x0.77 | 1 Shimmerleaf (100.0%) |
| 5 | Aluminium Oreberry | Stone | None | 6,000 | Cold, Dry | Needs a block of aluminium below, and a light level of 10 or lower | x0.77 | 6 Aluminum Oreberry (100.0%) |
| 5 | Ardite Oreberry | Stone | None | 6,000 | Hot, Nether | Needs a block of ardite below, and a light level of 10 or lower | x0.77 | 1 Ardite Nugget (100.0%) |
| 5 | Cobalt Oreberry | Stone | None | 6,000 | Nether, Dry | Needs a block of cobalt below, and a light level of 10 or lower | x0.77 | 1 Cobalt Nugget (100.0%) |
| 5 | Copper Oreberry | Stone | None | 6,000 | Hot, Sandy, Savanna | Needs a block of copper below, and a light level of 10 or lower | x0.77 | 6 Copper Oreberry (100.0%) |
| 5 | Essence Berry | Stone | None | 6,000 | Dead, Magical | Needs a skull below | x0.77 | 6 Concentrated Essence Berry (100.0%) |
| 5 | Gold Oreberry | Stone | None | 6,000 | Sandy, Mesa | Needs a block of gold below, and a light level of 10 or lower | x0.77 | 6 Gold Oreberry (100.0%) |
| 5 | Iron Oreberry | Stone | None | 6,000 | Hills, Mountain | Needs a block of iron below, and a light level of 10 or lower | x0.77 | 6 Iron Oreberry (100.0%) |
| 6 | Corium | Farmland | None | 800 | Forest, Plains | x0.74 | 1 Leather (100.0%) | |
| 6 | Bauxia | Stone | None | 1,200 | Cold, Dry | Needs a block of aluminium or bauxite below | x0.74 | 1 Bauxia Leaf (100.0%) |
| 6 | Coppon | Stone | None | 1,200 | Hot, Sandy, Savanna | Needs a block of copper below | x0.74 | 1 Coppon Fiber (100.0%) |
| 6 | Egg Plant | Farmland | None | 1,200 | Forest, Plains | Needs a light level of 9 or higher | x0.74 | 1 Raw Chicken (10.0%), 1 Feather (30.0%), 1 Egg (60.0%) |
| 6 | Galvania | Stone | None | 1,200 | Hot, Dry | Needs a block of zinc or sphalerite below | x0.74 | 1 Galvania Leaf (100.0%) |
| 6 | Plumbilia | Stone | None | 1,200 | Savanna, Plains | Needs a block of lead or galena below | x0.74 | 1 Plumbilia Leaf (100.0%) |
| 6 | Slimeplant | Dirt | None | 1,200 | Wet, Swamp | x0.74 | 1 Slimeball (100.0%) | |
| 6 | Thiosulfine | Stone | None | 1,200 | Hot, Nether | Needs a block of sulfur or sphalerite below | x0.74 | 1 Thiosulfine Flower (100.0%) |
| 6 | Redstraw | Farmland | None | 1,500 | Hot, Plains | Needs a block of redstone below, and a light level between 5-12 | x0.85 | 1 Redstone Dust (100.0%) |
| 6 | Milk Wart | Farmland | None | 2,400 | Lush, Plains | x0.74 | 1 Milk Wart (100.0%) | |
| 6 | Cassitine | Stone | None | 2,800 | Sparse, Cold, Dry | Needs a block of tin below | x0.74 | 1 Tiny Pile of Tin Dust (100.0%) |
| 6 | Ferrofern | Stone | None | 2,800 | Hills, Mountain | Needs a block of iron below | x0.74 | 1 Ferrofern Leaf (100.0%) |
| 6 | Malaxia | Stone | None | 2,800 | Lush, Plains | Needs a block of copper below | x0.74 | 1 Tiny Pile of Copper Dust (100.0%) |
| 6 | Plumbshade | Stone | None | 2,800 | Hot, Wet | Needs a block of lead or galena below | x0.74 | 1 Tiny Pile of Lead Dust (100.0%) |
| 6 | Bobs-Yer-Uncle-Ranks | Stone | None | 3,000 | Hills, Mountain | Needs a block of emerald below | x0.74 | 1 Emerald (25.0%), 1 Bobs-Yer-Uncle-Berry (75.0%) |
| 6 | Blazereed | Netherrack | None | 3,600 | Hot, Nether | x0.74 | 1 Blaze Rod (25.0%), 1 Blaze Powder (75.0%) | |
| 6 | Trollplant | Brick | None | 4,800 | Swamp, Spooky | x0.74 | 1 Scrap (12.50%), 1 Plutonium 241 Dust (12.50%), 1 Plantball (12.50%), 1 Spinel (62.50%) | |
| 7 | Spanish Moss | Farmland | None | 675 | Wet, Lush, Swamp, Forest | x0.70 | 1 Spanish Moss (100.0%) | |
| 7 | Garnydinia | Stone | None | 850 | Sandy, Mesa, Savanna | Needs a block of red or yellow garnet or garnet sand below | x0.70 | 1 Exquisite Yellow Garnet (2.50%), 1 Purified Red Garnet Ore (2.50%), 1 Exquisite Red Garnet (2.50%), 1 Purified Yellow Garnet Ore (2.50%), 1 Yellow Garnet (22.50%), 1 Red Garnet Dust (22.50%), 1 Red Garnet (22.50%), 1 Yellow Garnet Dust (22.50%) |
| 7 | Creeperweed | Farmland | None | 1,000 | Dead, Spooky | x0.70 | 1 Gunpowder (100.0%) | |
| 7 | Ember Moss | Farmland | None | 1,100 | Hot, Dry | x0.70 | 1 Ember Moss (100.0%) | |
| 7 | Argentia | Stone | None | 1,400 | Hot, Mountain | Needs a block of silver below | x0.70 | 1 Argentia Leaf (100.0%) |
| 7 | Coffee | Farmland | None | 2,800 | Hot, Wet, Lush | Needs a light level of 9 or higher | x0.70 | 1 Coffee (100.0%) |
| 7 | Lazulia | Stone | None | 2,800 | Hot, Sandy | Needs a block of lapis below | x0.70 | 1 Lapis Lazuli (33.33%), 1 Lapis Dust (66.67%) |
| 7 | Thaumium Oreberry | Stone | None | 3,000 | Spooky, Magical | Needs a block of thaumium below, and a light level of 10 or lower | x0.70 | 1 Thaumium Nugget (100.0%) |
| 7 | Meatrose | Dirt | None | 4,200 | Plains, Magical | Needs a light level of 9 or higher | x0.70 | 1 Raw Chicken (10.0%), 1 Raw Beef (10.0%), 1 Raw Porkchop (10.0%), 1 Raw Cod (10.0%), 1 Pink Dye (60.0%) |
| 7 | Thauminite Oreberry | Stone | None | 4,500 | Forest, Magical | Needs a block of thauminite below, and a light level of 10 or lower | x0.70 | 1 Thauminite Nugget (100.0%) |
| 7 | Void Metal Oreberry | Stone | None | 4,500 | Wasteland, Magical | Needs a block of void below, and a light level of 10 or lower | x0.70 | 1 Void Metal Nugget (100.0%) |
| 8 | Oil Berry | Sand+Gravel | None | 1,200 | Hot, Wasteland | x0.66 | 2 Oil Berry (100.0%) | |
| 8 | Rubyne | Stone | None | 1,200 | River, Mountain, Cold | Needs a block of ruby below | x0.66 | 1 Ruby (25.0%), 1 Ruby Dust (75.0%) |
| 8 | Evil Ore | Netherrack | None | 1,600 | Hot, Nether, Dry | x0.66 | 1 Nether Quartz (16.67%), 1 Certus Quartz Dust (16.67%), 1 Nether Quartz Dust (66.66%) | |
| 8 | Auronia | Stone | None | 3,700 | Sandy, Mesa | Needs a block of gold below | x0.66 | 1 Auronia Leaf (100.0%) |
| 8 | Silviscus | Stone | None | 3,700 | Snowy, Cold, Spooky | Needs a block of silver below | x0.66 | 1 Tiny Pile of Silver Dust (100.0%) |
| 8 | Liveroot | Farmland | None | 4,800 | Dense, Spooky | x0.66 | 1 Liveroot (75.0%), 1 Liveroot Dust (75.0%) | |
| 8 | Tearstalks | Farmland | None | 4,800 | Nether, Spooky | x0.66 | 1 Ghast Tear (66.66%) | |
| 8 | Withereed | Stone | None | 4,800 | Dead, Spooky | Needs a block of coal below | x0.66 | 1 Wither Skeleton Skull (1.29%), 1 Skeleton Skull (2.58%), 1 Coal (33.33%), 1 Coal Dust (66.67%) |
| 8 | Knightly Oreberry | Stone | None | 5,500 | Dead, Spooky | Needs a block of knightmetal below, and a light level of 10 or lower | x0.66 | 4 Armor Shard (100.0%) |
| 9 | Micadia | Stone | None | 1,800 | Sparse, Hills | Needs a block of mica or cupronickel coil below | x0.63 | 1 Micadia Flower (100.0%) |
| 9 | Titania | Stone | EV | 1,800 | Hot, Savanna | IF only, needs a block of titanium, ilmenite, or rutile below | x0.63 | 1 Titania Leaf (100.0%) |
| 9 | God of Thunder | Stone | HV | 3,600 | Sparse, Wasteland | IF only, needs a block of thorium or thorianite below | x0.63 | 1 Thunder Flower (100.0%) |
| 10 | Enderbloom | Farmland | None | 3,000 | End, Cold | Needs a block of endstone below | x0.60 | 1 Ender Pearl (37.50%), 1 Enderpearl Dust (62.50%) |
| 10 | Steeleafranks | Stone | None | 6,000 | Dead, Spooky | Needs a block of steeleaf below | x0.60 | 1 Steeleaf (25.0%), 1 Steeleaf Dust (25.0%) |
| 11 | Platina | Stone | HV | 6,600 | Hot, Sandy | IF only, needs a block of platinum or sheldonite below | x0.57 | 1 Platina Leaf (100.0%) |
| 12 | Pyrolusium | Stone | None | 2,400 | Hot, Nether | Needs a block of manganese or pyrolusite below | x0.54 | 1 Pyrolusium Leaf (100.0%) |
| 12 | Scheelinium | Stone | EV | 2,400 | Wet, Ocean, Cold | IF only, needs a block of tungsten, scheelite, or tungstate below | x0.54 | 1 Scheelinium Leaf (100.0%) |
| 12 | Reactoria | Stone | EV | 4,800 | Hot, Cold | IF only, needs a block of uranium, uranite, or pitchblende below | x0.54 | 1 Reactoria Stem (25.0%), 1 Reactoria Leaf (75.0%) |
| 12 | Iridine | Stone | IV | 7,200 | Snowy, Cold | IF only, needs a block of iridium below | x0.54 | 1 Iridine Leaf (75.0%) |
| 12 | Osmianth | Stone | IV | 7,200 | River, Ocean | IF only, needs a block of osmium below | x0.54 | 1 Osmianth Flower (25.0%) |
| 12 | Star Wart | Stone | EV | 7,200 | Dead, Nether | IF only, needs a block of nether star below | x0.54 | 1 Star Wart (100.0%) |
| 12 | Stargatium | Stone | IV | 7,200 | Lush, Wasteland | IF only, needs a block of naquadah below | x0.54 | 1 Endstone Dust (25.0%), 1 Stargatium Leaf (75.0%) |
| 12 | Transformium | Farmland | EV | 7,200 | End, Cold | IF only | x0.54 | 1 UUM Berry (10.0%), 1 UUA Berry (90.0%) |
| 12 | Diareed | Stone | None | 10,800 | Sparse, Cold | Needs a block of diamond below | x0.54 | 1 Diareed (100.0%) |
| 13 | Space Flower | Farmland | IV | 15,000 | Dead, Cold, Dry | IF only, needs a block from space below | x0.51 | 1 Space Flower (100.0%) |
| 13 | Magical Nightshade | Farmland | HV | 23,436 | Cold, Magical | IF only, needs a block of shadow metal below | x0.39 | 1 Magic Essence (100.0%) |
| 16 | Primordial Berry | Farmland | None | 375,000 | End, Magical | x0.50 | 1 Primordial Pearl (100.0%) |